https://docs.unity3d.com/Packages/com.unity.shadergraph@17.0/manual/Master-Stack.html
Master Stack
Description
Master Stack은 셰이더의 최종 표면 모습을 정의하는 Shader Graph의 끝점입니다.
The Master Stack is the end point of a Shader Graph that defines the final surface appearance of a shader.
Shader Graph에는 항상 하나의 마스터 스택만 포함되어야 합니다.
Your Shader Graph should always contain only one Master Stack.
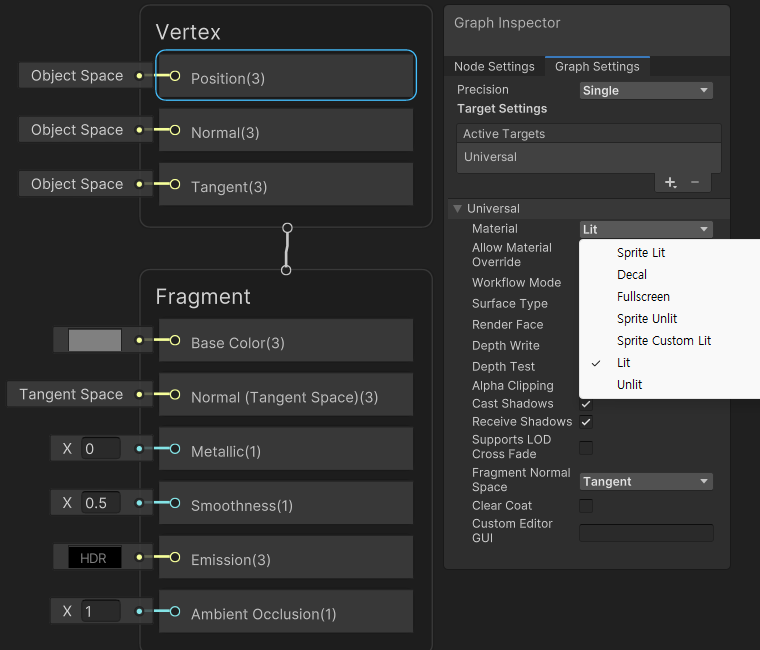
마스터 스택의 내용은 선택한 Graph Settings에 따라 변경될 수 있습니다.
The content of the Master Stack might change depending on the Graph Settings you select.
마스터 스택은 Block nodes를 포함하는 컨텍스트로 구성됩니다.
The Master Stack is made up of Contexts, which contain Block nodes.
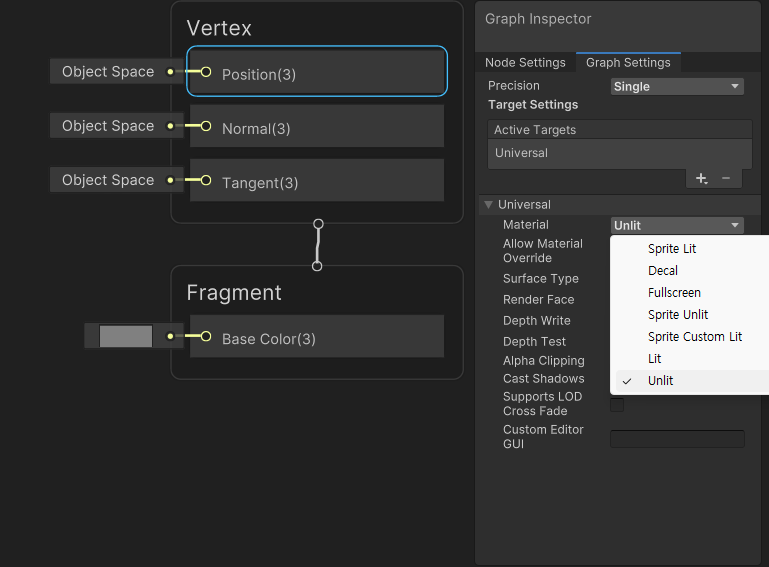
Contexts
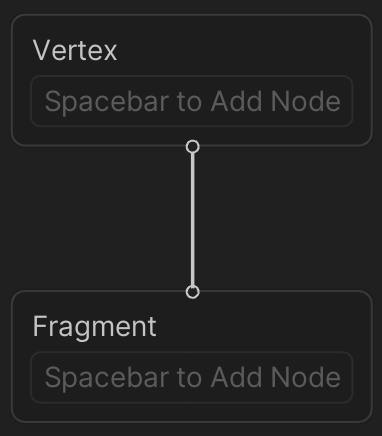
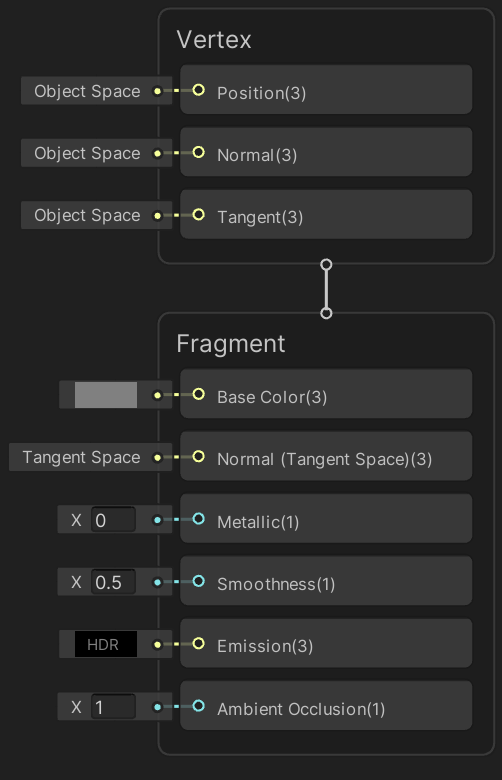
마스터 스택에는 두 개의 컨텍스트인 Vertex와 Fragment가 포함되어 있습니다.
The Master Stack contains two Contexts: Vertex and Fragment.
이들은 shader의 두 단계를 나타냅니다.
These represent the two stages of a shader.
Vertex Context의 Block에 연결하는 노드는 최종 shader의 Vertex function의 일부가 됩니다.
Nodes that you connect to Blocks in the Vertex Context become part of the final shader’s vertex function.
Fragment Context의 블록에 연결하는 Node는 최종 shader의 Fragment(또는 픽셀) function의 일부가 됩니다.
Nodes that you connect to Blocks in the Fragment Context become part of the final shader’s fragment (or pixel) function.
두 컨텍스트에 모두 노드를 연결하면 해당 node가 Vertex function에서 한 번 실행되고 Fragment function에서 다시 한 번 실행됩니다.
If you connect any nodes to both Contexts, they are executed twice, once in the vertex function and then again in the fragment function.
컨텍스트를 잘라내거나 복사하거나 붙여넣을 수 없습니다.
You can’t cut, copy, or paste Contexts.
https://docs.unity3d.com/Packages/com.unity.shadergraph@17.0/manual/Sticky-Notes.html
Sticky Notes
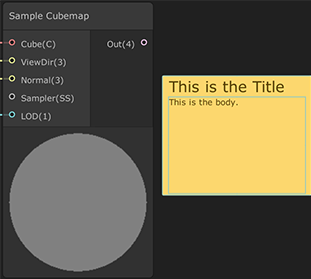
Sticky Note는 그래프 보기에서 작성할 수 있는 객체로, 코드의 주석과 유사합니다. 제목(title)과 본문(body)으로 구성되어 있습니다.
Sticky Notes are objects in a graph view that you can write in. They are the graph view equivalent of a comment in code, and consist of a title and body.
그래프에서 원하는 만큼 만들 수 있으며 다음과 같은 다양한 용도로 사용할 수 있습니다:
You can create as many as you want in the graph, and use them for a variety of purposes, for example:
- 그래프의 섹션 작동 방식을 설명하는 데 사용할 수 있습니다.
To describe how a section of your graph works. - 유니티 프로젝트에서 공동 작업하는 사용자 또는 다른 사용자에게 메모를 남깁니다.
To leave notes for yourself or others collaborating in your Unity Project. - 나중에 완료할 작업을 포함하는 할 일 목록으로 사용할 수 있습니다.
As a to-do list that includes tasks to complete at a later date.
Using Sticky Notes
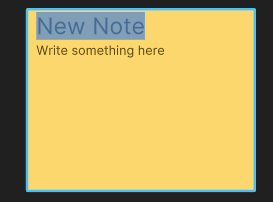
Sticky Note를 만들려면 그래프 보기에서 빈 공간을 마우스 오른쪽 단추로 클릭하고 컨텍스트 메뉴에서 Create Sticky Note를 클릭합니다.
To create a Sticky Note, right-click an empty space in the graph view and, in the context menu, click Create Sticky Note.
그런 다음 새 Sticky Note에 내용을 사용자 정의하고 추가할 수 있습니다.
You can then customize and add content to the new Sticky Note.
다음에 쓸 수 있는 텍스트 영역은 두 가지입니다:
There are two text areas that you can write in:
- 제목 : Sticky Note 상단에 있는 텍스트 영역이 제목입니다. 이를 사용하여 Sticky Note에 어떤 정보가 포함되어 있는지 간결하게 설명할 수 있습니다.
Title: The text area at the top of the Sticky Note is the title. You can use it to concisely describe what information the Sticky Note contains. - 본문: 제목 영역 아래에 있는 더 큰 텍스트 영역은 본문입니다. 여기에 메모의 전체 내용을 작성하시면 됩니다.
Body: The larger text area below the title area is the body. You can write the full contents of the note here.
Editing text
Sticky Note에서 텍스트를 편집하려면 텍스트 영역을 두 번 클릭합니다.
To edit text on a Sticky Note, double-click on a text area.
또한 전체 텍스트 영역을 선택하므로 텍스트를 편집하기 전에 커서를 이동해야 합니다.
This also selects the entire text area, so be sure to move the cursor before you edit the text.
Moving and resizing
그래프의 아무 곳이나 스티커 메모를 이동할 수 있습니다.
You can move Sticky Notes anywhere on the graph.
클릭한 후 드래그하여 Sticky Note의 크기를 수동으로 조정하거나 Sticky Note가 내용에 맞게 자동으로 크기를 조정하도록 할 수도 있습니다.
You can also click and drag to manually resize Sticky Notes, or have a Sticky Note automatically resize itself to fit the content.
Sticky Note 크기를 직접 조정하는 방법에 대한 자세한 내용은 아래 Context menu 섹션의 Fit To Text를 참조하십시오.
For information on how to make the Sticky Note resize itself, see Fit To Text in the Context menu section below.
Duplicating
다음 키보드 바로 가기를 사용하여 Sticky Note를 자르고, 복사하고, 붙여넣고, 복제합니다.
Use the following keyboard shortcuts to cut, copy, paste, and duplicate Sticky Notes.
- Copy: Ctrl+C
- Cut: Ctrl+X
- Paste: Ctrl+V
- Duplicate: Ctrl+D
Context menu
Sticky Note의 컨텍스트 메뉴를 열려면 해당 메뉴의 아무 곳이나 마우스 오른쪽 단추로 클릭합니다.
To open the context menu for a Sticky Note, right-click anywhere on it.
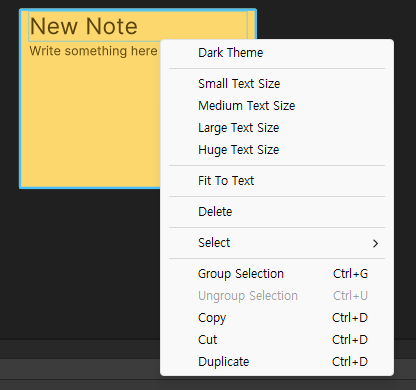
컨텍스트 메뉴의 옵션은 다음과 같습니다.
The options in the context menu are as follows.
| Option | Description |
|---|---|
| Dark Theme/Light Theme | Sticky Note의 색상 테마를 밝은 테마와 어두운 테마 사이에서 전환합니다. Toggles the color theme of the Sticky Note between light theme and dark theme. |
| Text Size | 각 텍스트 영역의 폰트 크기를 다음과 같은 포인트 값으로 조정합니다. Resizes the font in the text areas to the following point values. |
| Small | Title: 20, Body: 11 |
| Medium | Title: 40, Body: 24 |
| Large | Title: 60, Body: 36 |
| Huge | Title: 80, Body: 56 |
| Fit To Text | Sticky Note의 크기를 텍스트 영역에 정확히 맞게 조정합니다. Resizes the Sticky Note so that it precisely fits the text areas. 제목이 한 줄을 초과하는 경우 Unity는 제목 텍스트가 한 줄에 맞게 Sticky Note의 크기를 조정합니다. If your title exceeds a single line, Unity resizes the Sticky Note such that title text fits on a single line. |
| Delete | 선택한 Sticky Note를 삭제합니다. Deletes the Sticky Note you selected. |
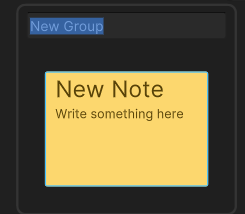
| Group Selection | 선택한 Sticky Note를 그룹에 배치합니다. Places any Sticky Notes you select in a group. |
| Ungroup Selection | 그룹에서 선택한 모든 Sticky Notes를 제거합니다. Removes any Sticky Notes you select from the group. |