요약
namespace TEST
{
    using UnityEngine;
    using UnityEngine.InputSystem;

    public class APPInputManager : MonoBehaviour, AppInputControls.IPlayerContollerActionMapActions
    {
        private AppInputControls _Inputs;

        private void Awake()
        {
            _Inputs = new AppInputControls();
            _Inputs.Enable();
            _Inputs.PlayerContollerActionMap.SetCallbacks(this);
        }


        #region 항상 확인

        private void Update()
        {
            Debug.LogFormat($"<color=green>WASD Key : {_Inputs.PlayerContollerActionMap.WASD_Test.ReadValue<Vector2>()}</color>");
        }

        #endregion


        #region CallBack 방식

        void AppInputControls.IPlayerContollerActionMapActions.OnMouse_Left(InputAction.CallbackContext context)
        {
            if (context.performed) // 버튼이 눌린 순간 이벤트 발생
                Debug.LogFormat($"<color=white>마우스 버튼 : {context.performed}</color>");

            if (context.canceled) // 버튼을 뗀 순간 이벤트 발생
                Debug.LogFormat($"<color=red>마우스 버튼 : {context.performed}</color>");
        }


        void AppInputControls.IPlayerContollerActionMapActions.OnWASD_Test(InputAction.CallbackContext context)
        {
            Vector2 movementInput = context.ReadValue<Vector2>();
            Debug.LogFormat($"WASD Key : {movementInput}");
        }

        #endregion
    }


}
Unity Version : 2021.3.5f1
https://docs.unity3d.com/Packages/com.unity.inputsystem@1.4/manual/Installation.html <- 가이드 문서
설치
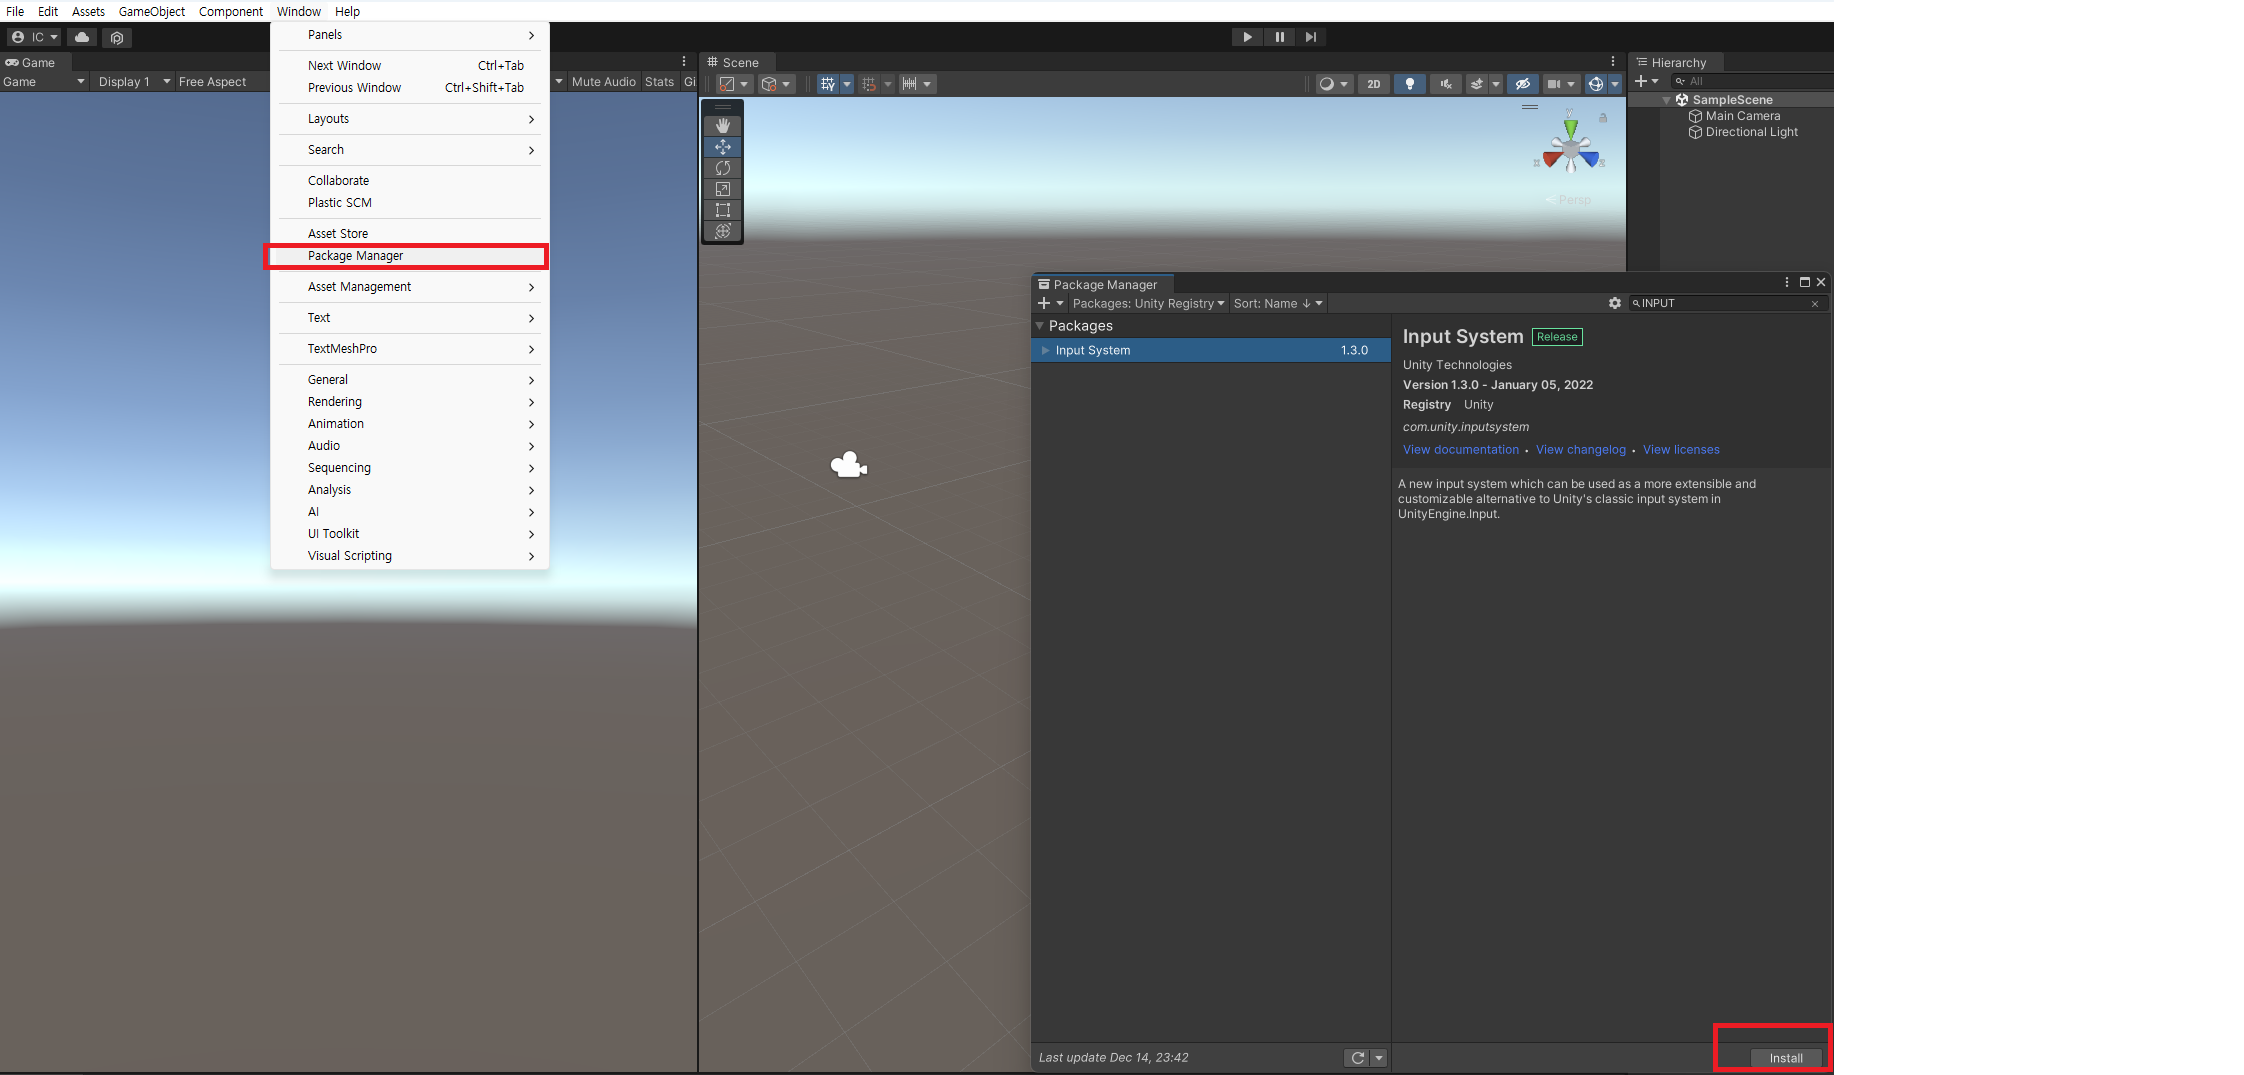
새 입력 시스템을 설치하려면 Unity의 패키지 관리자를 엽니다(menu: Window > Package Manager ).
목록 에서 입력 시스템 패키지를 선택한 다음 설치 를 클릭합니다 .
새 입력 백엔드 활성화
기본적으로 Unity의 클래식 입력 관리자( UnityEngine.Input)는 활성화되어 있으며 새 입력 시스템에 대한 지원은 비활성화되어 있습니다.
이를 통해 기존 Unity 프로젝트를 그대로 유지할 수 있습니다.
This project is using the new input system package but the native platform backends for the new input system are not enabled in the player settings.

This means that no input from native devices will come through.

Do you want to enable the backends? Doing so will "RESTART" the editor and will "DISABLE" the old UnityEngine.Input APIs.
입력 시스템 패키지를 설치할 때 Unity는 새 백엔드를 활성화할지 여부를 묻습니다.
예 를 클릭하면 Unity가 새 백엔드를 활성화하고 이전 백엔드를 비활성화하며 에디터가 다시 시작됩니다.
활성 입력 처리 아래 의 플레이어 설정(메뉴: menu: Edit > Project Settings > Player ) 에서 해당 설정을 찾을 수 있습니다 .
언제든지 이 설정을 변경할 수 있습니다.

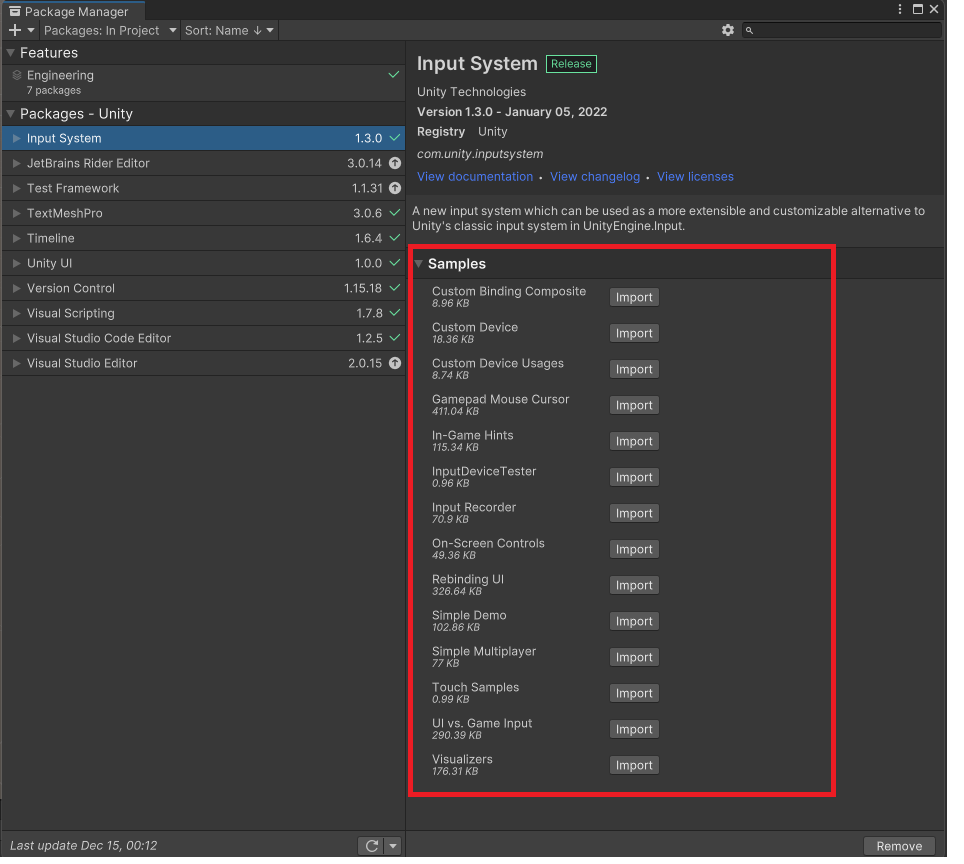
샘플 설치
입력 시스템 패키지는 여러 샘플과 함께 제공됩니다. Unity의 패키지 관리자 창(menu: Window > Package Manager ) 에서 직접 설치할 수 있습니다 .
목록을 보려면 패키지 관리자 창에서 입력 시스템 패키지를 선택하십시오.
샘플 옆에 있는 프로젝트로 가져오기를 클릭 하여 현재 프로젝트에 복사합니다.
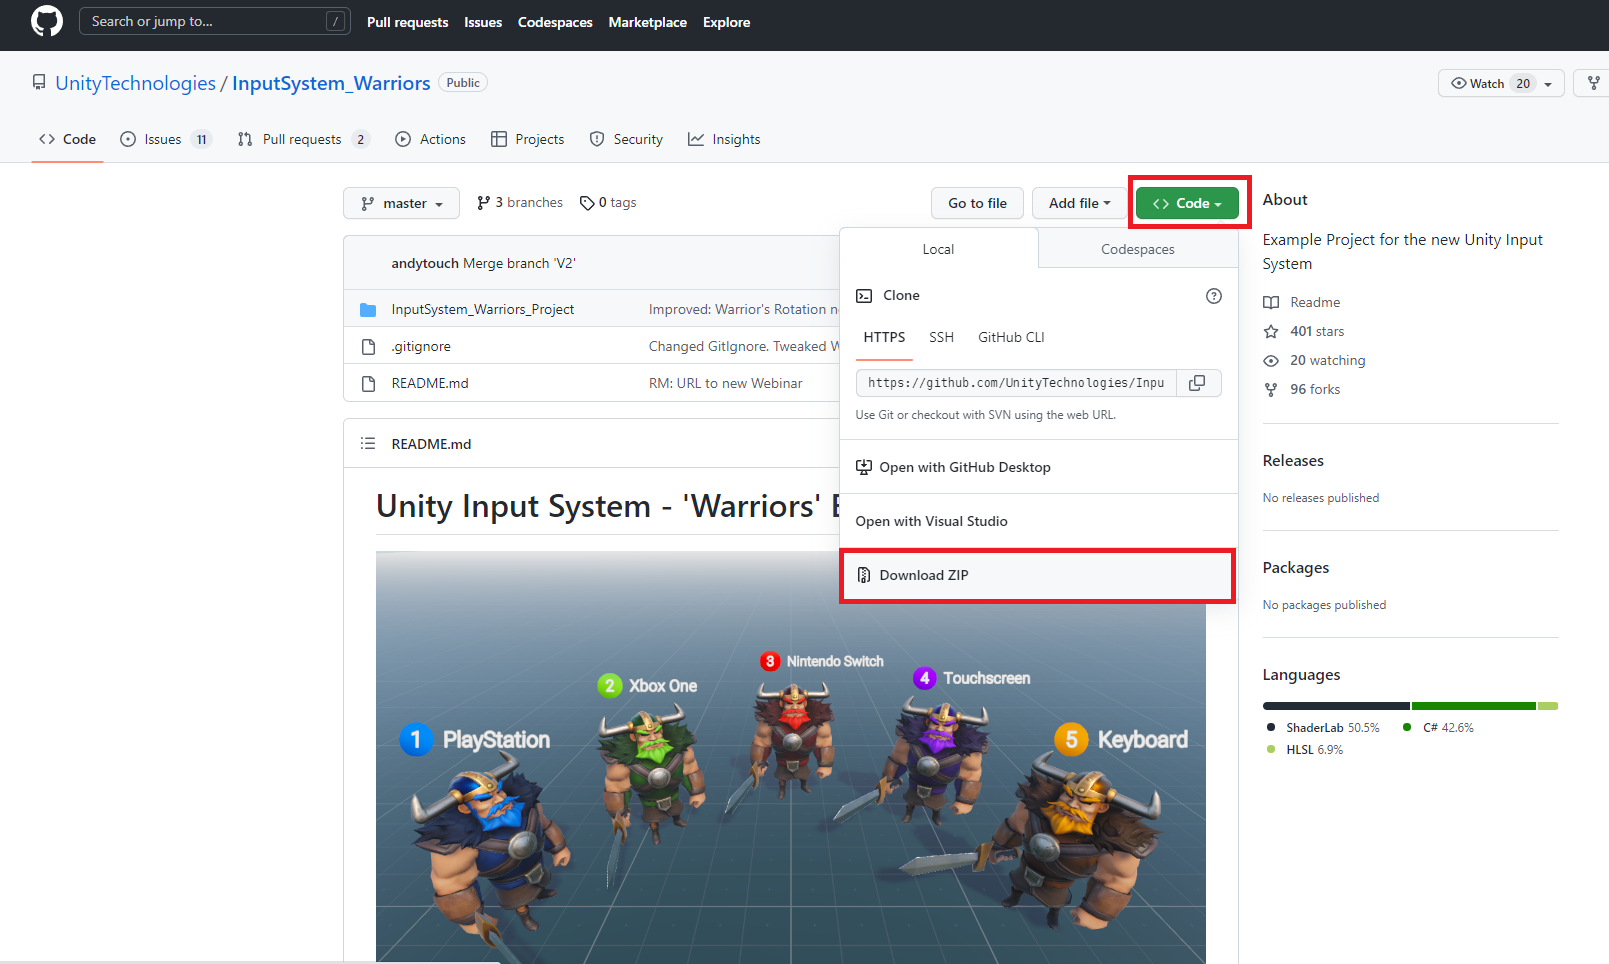
입력 시스템에 대한 보다 포괄적인 데모 프로젝트는 InputSystem_Warriors GitHub 리포지토리를 참조
https://github.com/UnityTechnologies/InputSystem_Warriors <- 다운로드
버전 변경
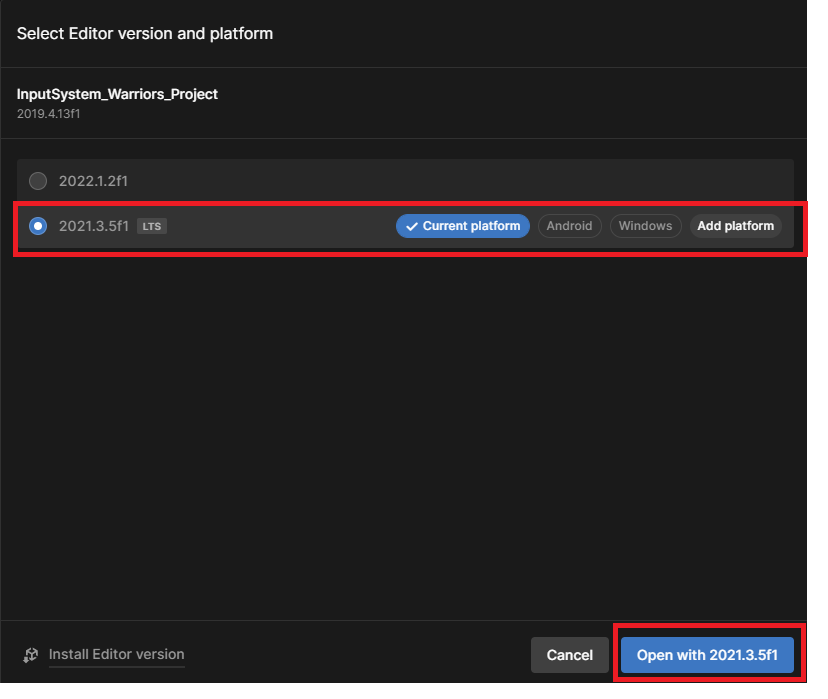
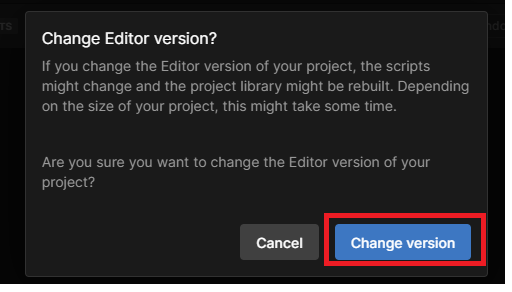
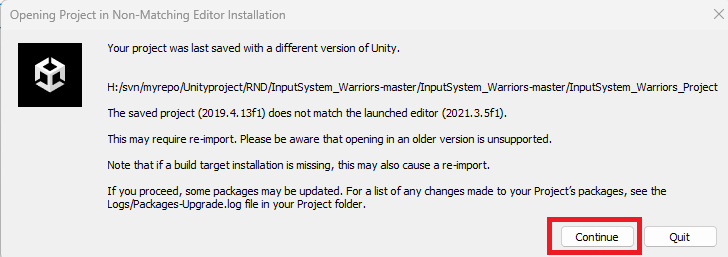
열려고 하는 프로젝트가 마지막으로 저장된 버전과, 지금 열려고 하는 에디터의 버전이 맞지 않을 때 발생
저장된 프로젝트는 2019.4.12f1 버전이고, 현재 에디터는 2021.3.5f1 버전이기 때문에 호환문제가 있을 수 있다는 이야기
여기서 Continue를 누르게 되면 일부 패키지가 업데이트 될 수 있으며,
그렇게 변경된 프로젝트 패키지 목록은 프로젝트 폴더 내에 있는 Logs/Packages-Upgrade.log 파일에서 확인이 가능하다고 쓰여있다.
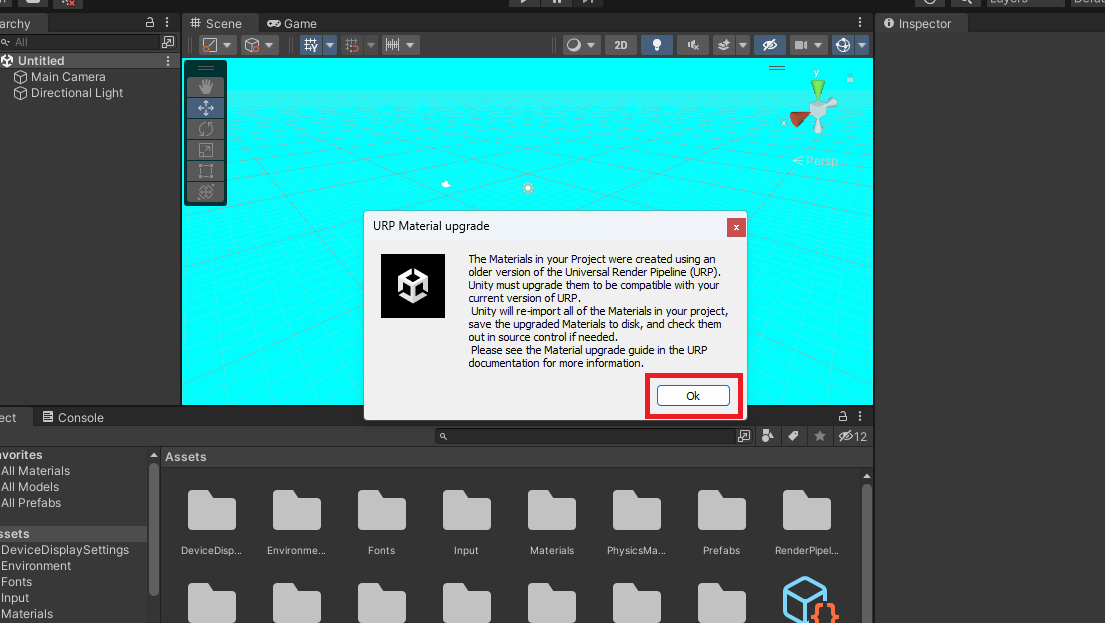
보통 여기서 Continue를 누르는 경우 프로젝트 내에서 각종 에러가 터진다. (예제만 간단하게 살펴볼 생각이라 Continue 를 선택함)

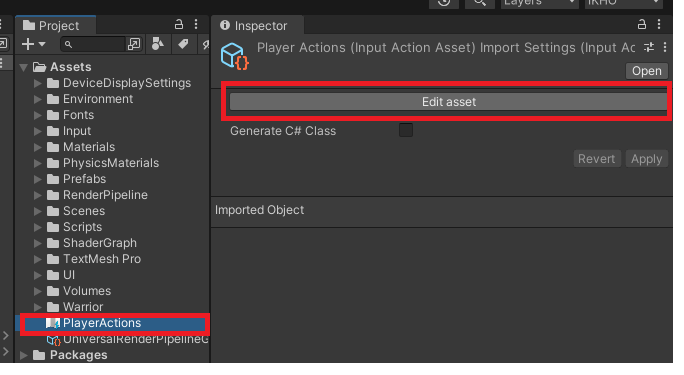
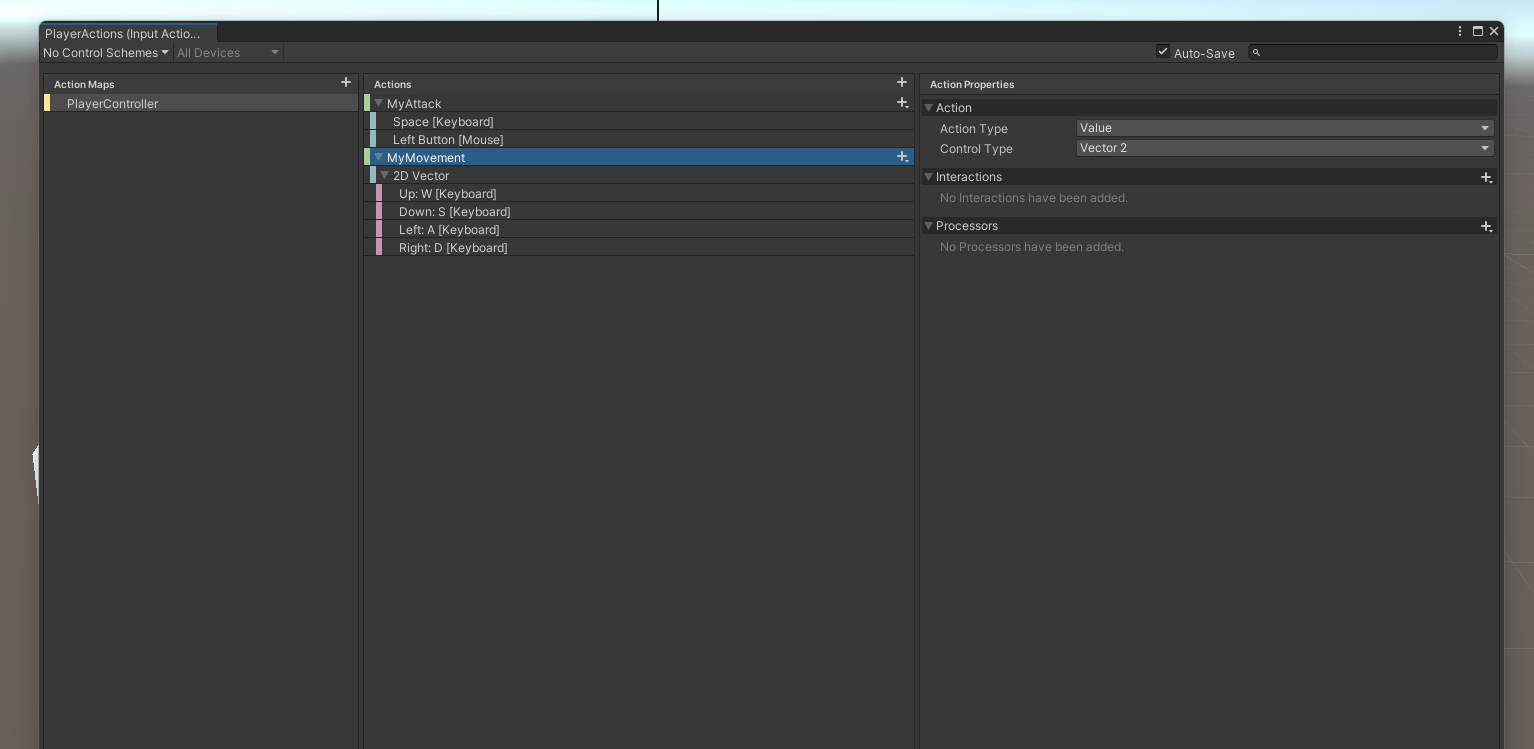
Input Actions를 PlayerActions 이름으로 하나 생성
Action Maps / Actions / Properties
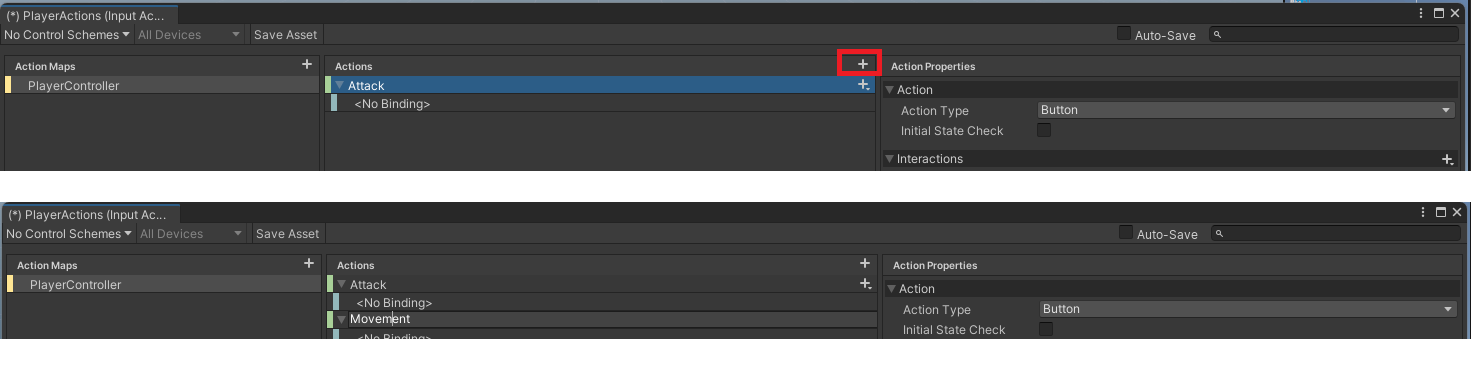
공격 및 이동을 입력
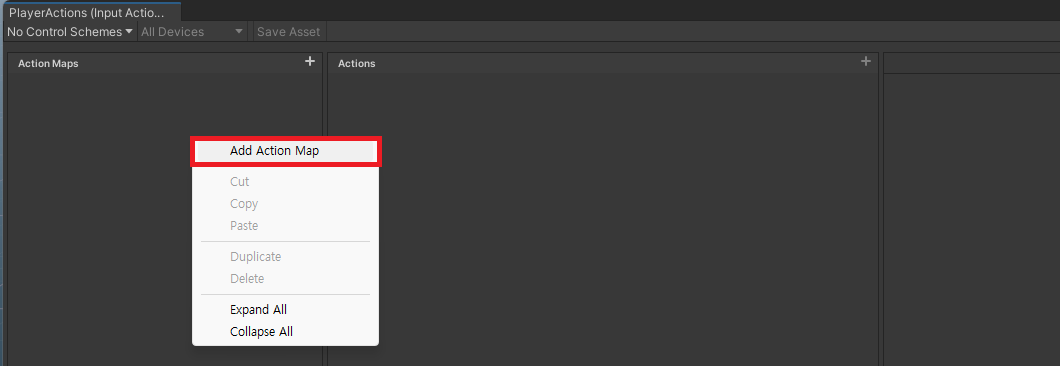
ActionMap을 하나 만들어줍니다.

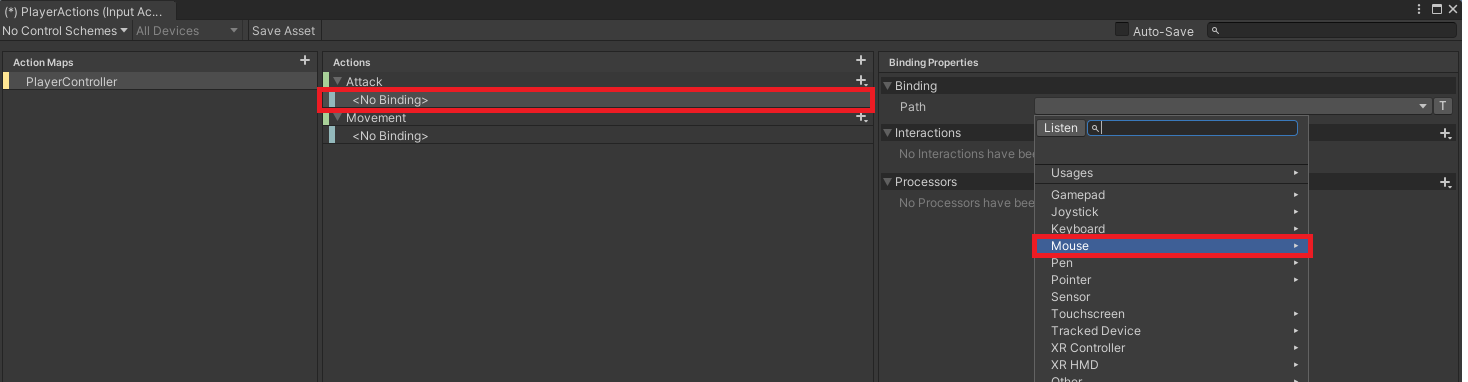
Action의 이름을 Attack으로 변경합니다.
공격의 경우 버튼으로 실행하기 때문에 버튼으로 선택해줍니다.
-> 키보드의 키 트리거나 게임 패드의 일반 버튼이 될 수 있습니다.


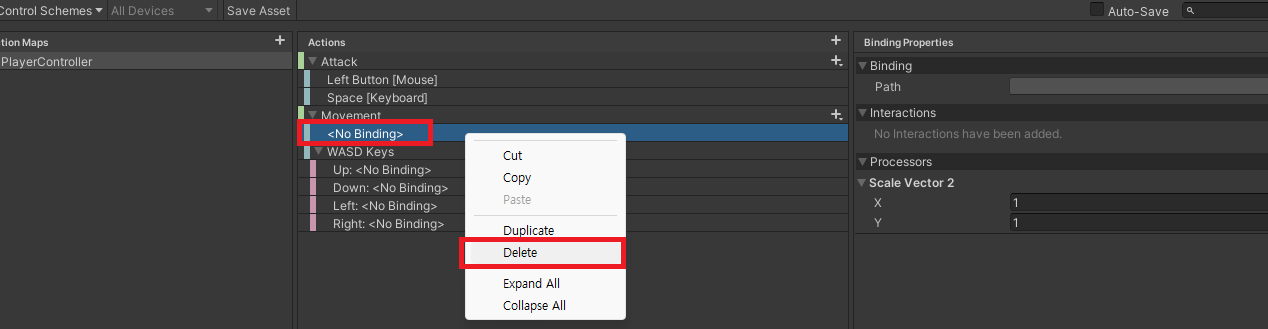
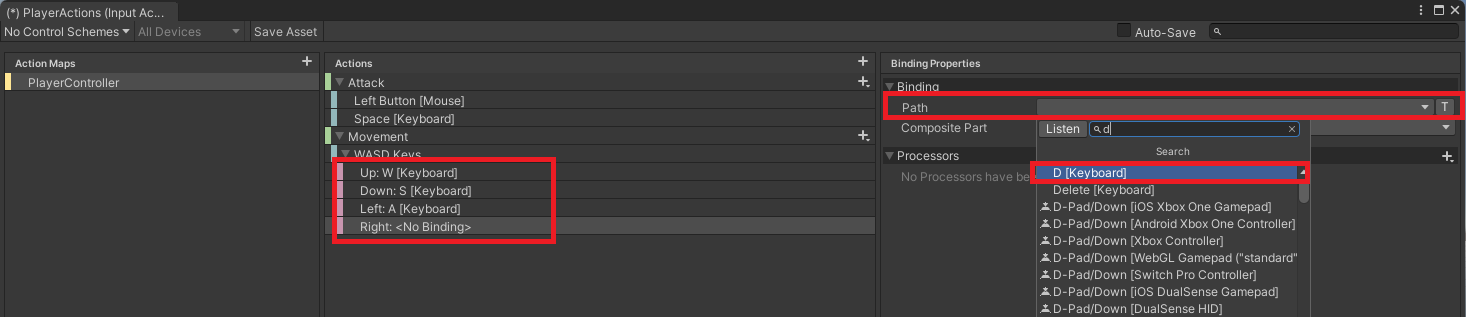
Action을 추가로 하나 생성하고 이름을 Movement로 변경하고 ActionType을 Value로 변경합니다.
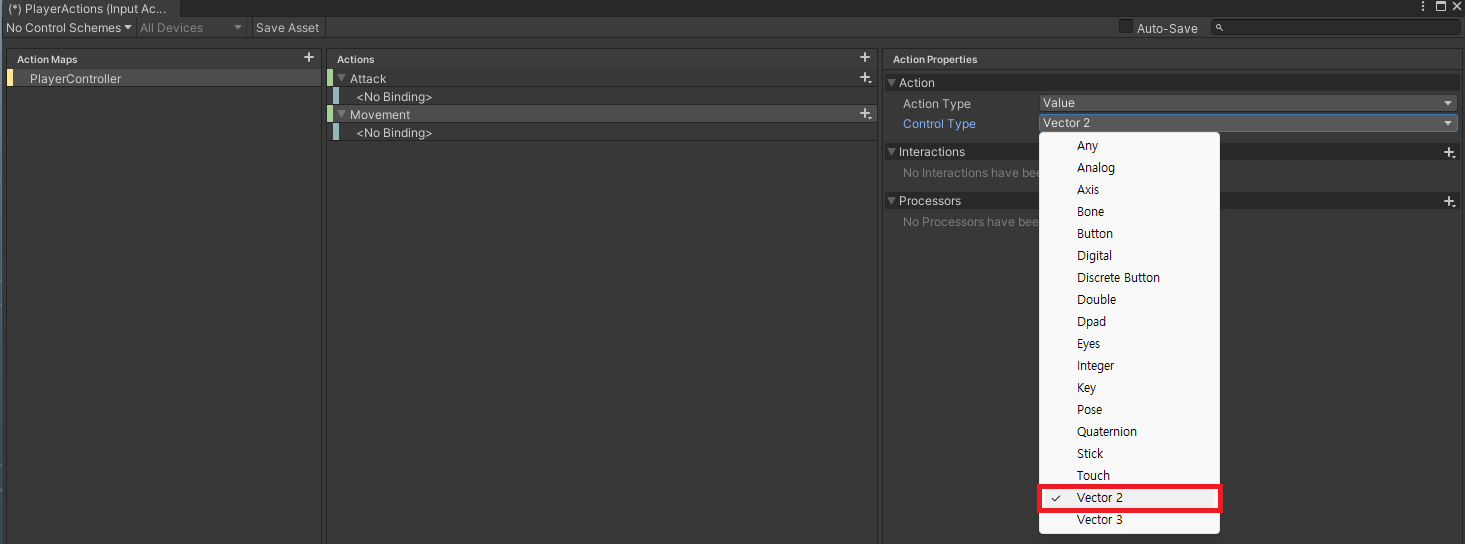
Value는 조이스틱과 같은 지속적인 변화를 추적할 수 있는 입력에 사용해야 합니다.
값을 사용하면 Control Type의 필드가 생성됩니다.
Control Type은 반환되는 값의 유형을 나타냅니다.
Vecter2를 선택합니다. (조이스틱으로 X축과 Y축을 얻습니다.)

Binding을 선택하면 경로를 선택할 수 있습니다.
이것은 해당 바인딩이 무엇에 해당하는지 정의하는 방법 입니다.
Attack(공격) 정의

Movement(이동) 정의

변경사항을 저장하려면 SaceAsset을 누르고 자동으로 저장하려면 Auto-Save를 체크하세요.

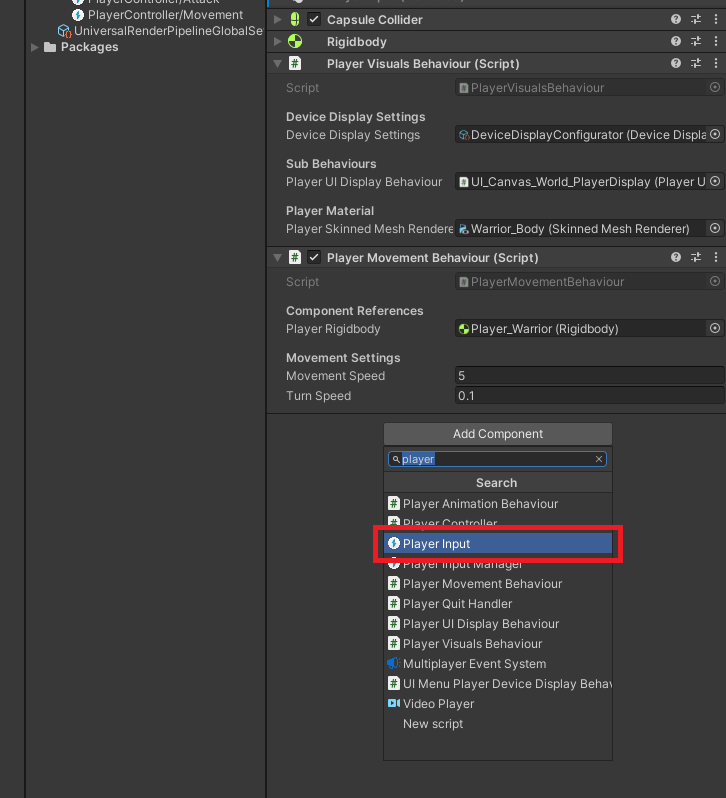
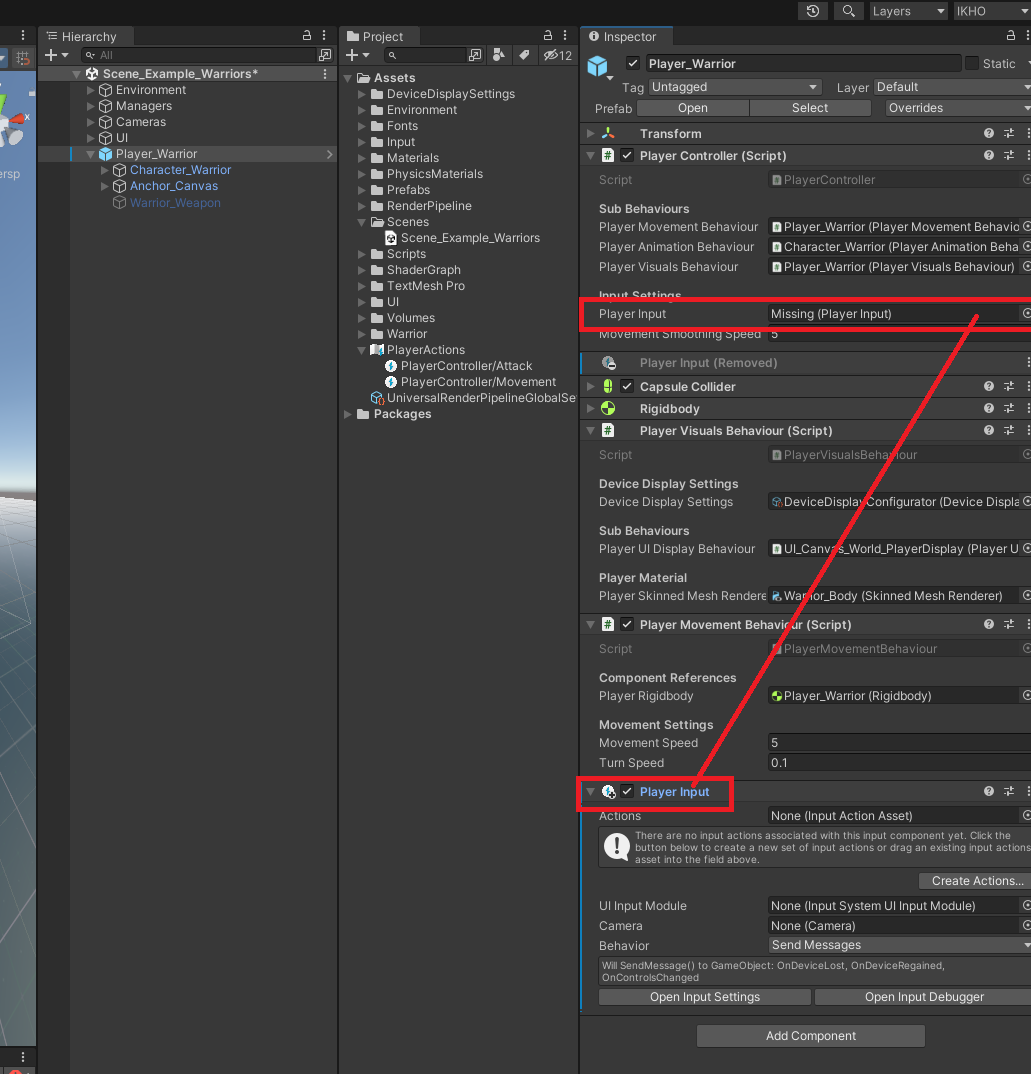
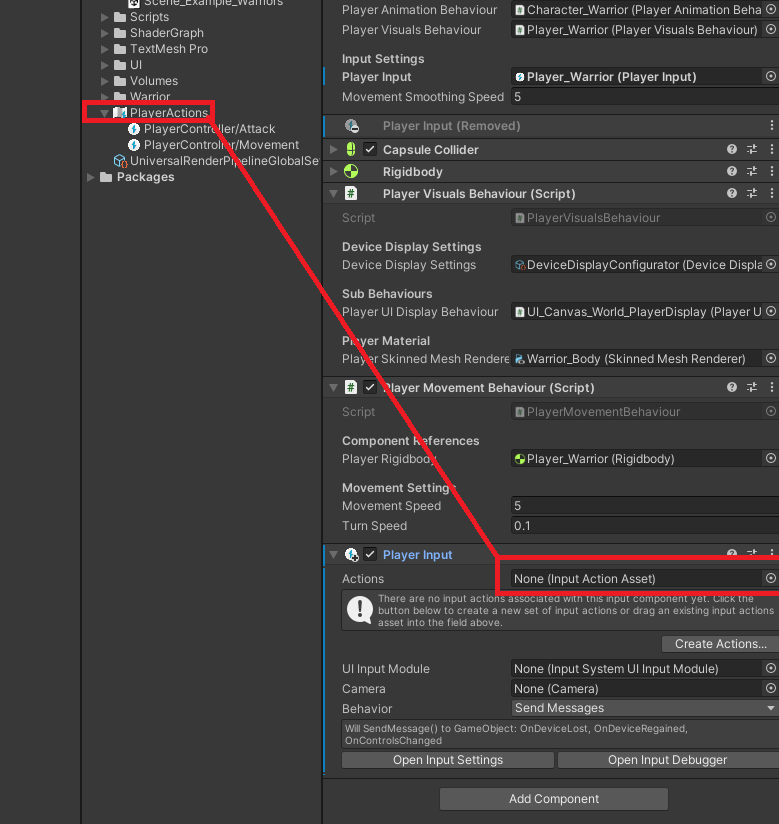
해당 인풋 적용
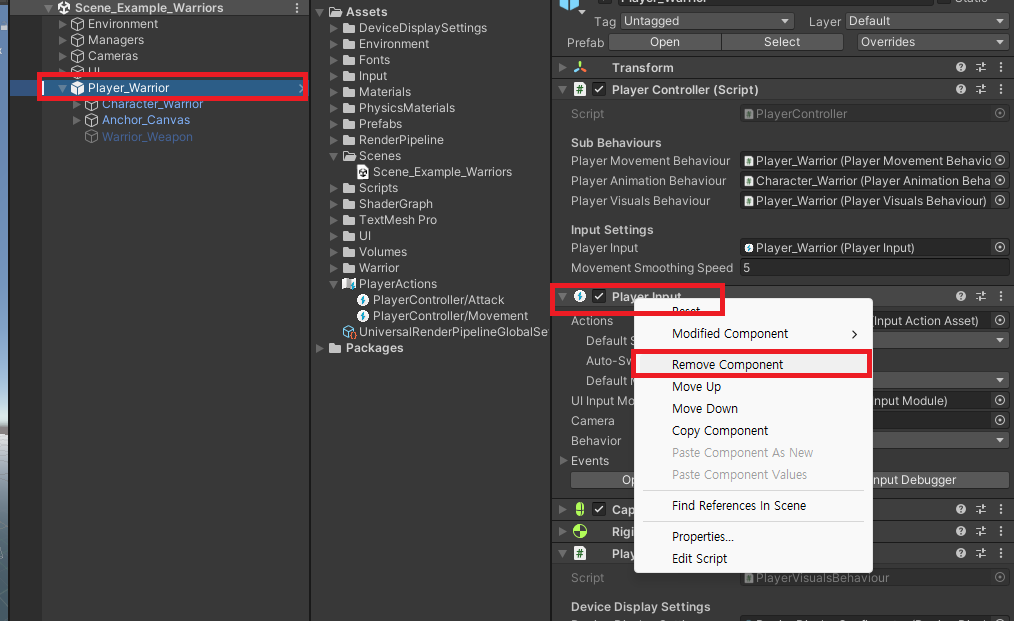
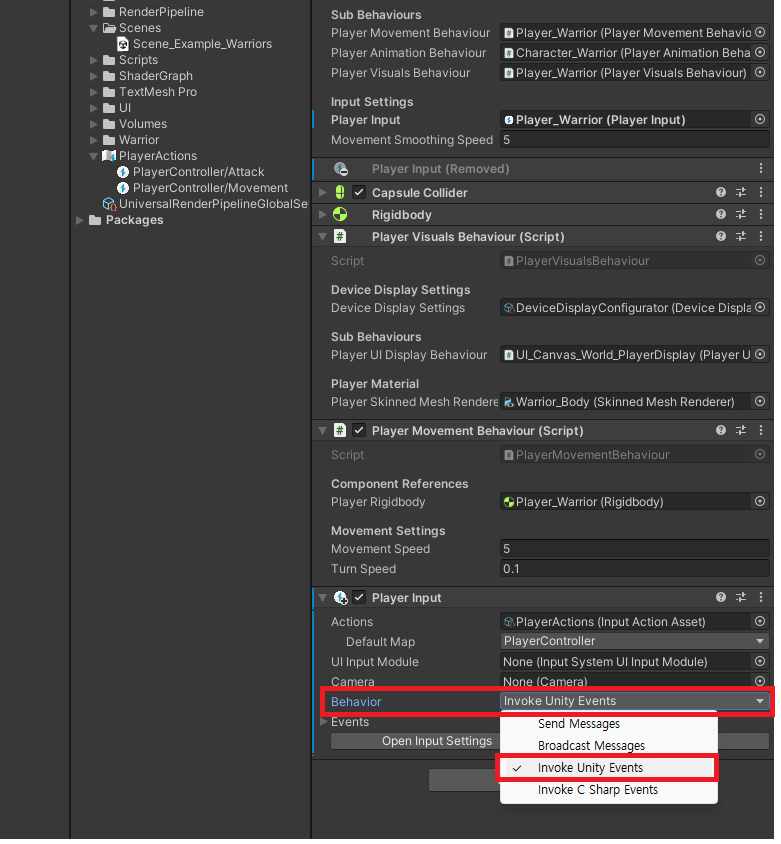
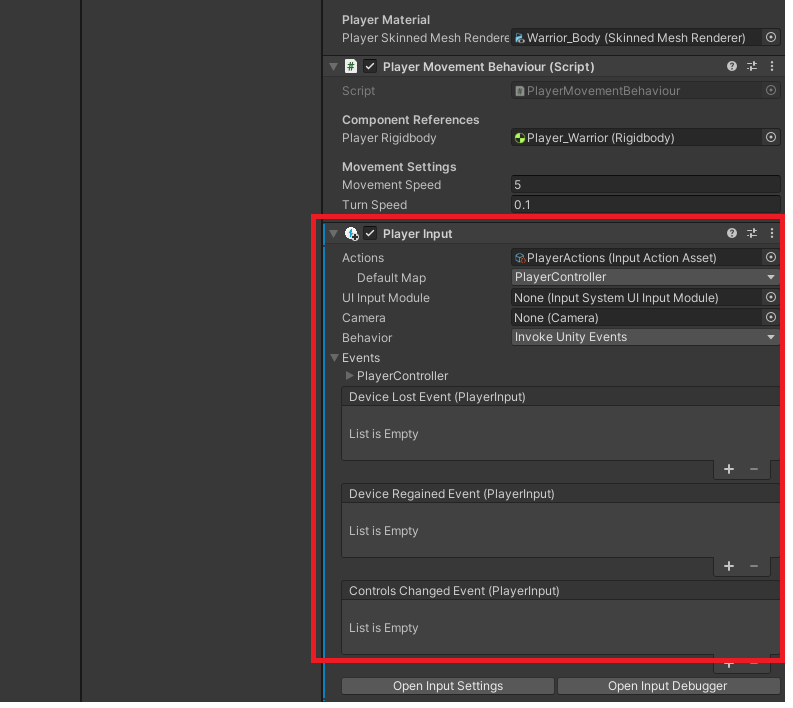
적용되어있는 Player Input을 제거해줍니다
추가적으로 플레이어 입력 구성요소가 뭔가 발생했음을 알리는 방법을 결정합니다. (이벤트 사용)
진행하다 해당 프로젝트의 버전과 지금 버전의 차이가 있어서 중단
(나중에 따로 프로젝트를 생성하여 모바일 터치 쪽으로 공부하여 적용할 예정)
나머지 부분은 해당 영상에서 확인
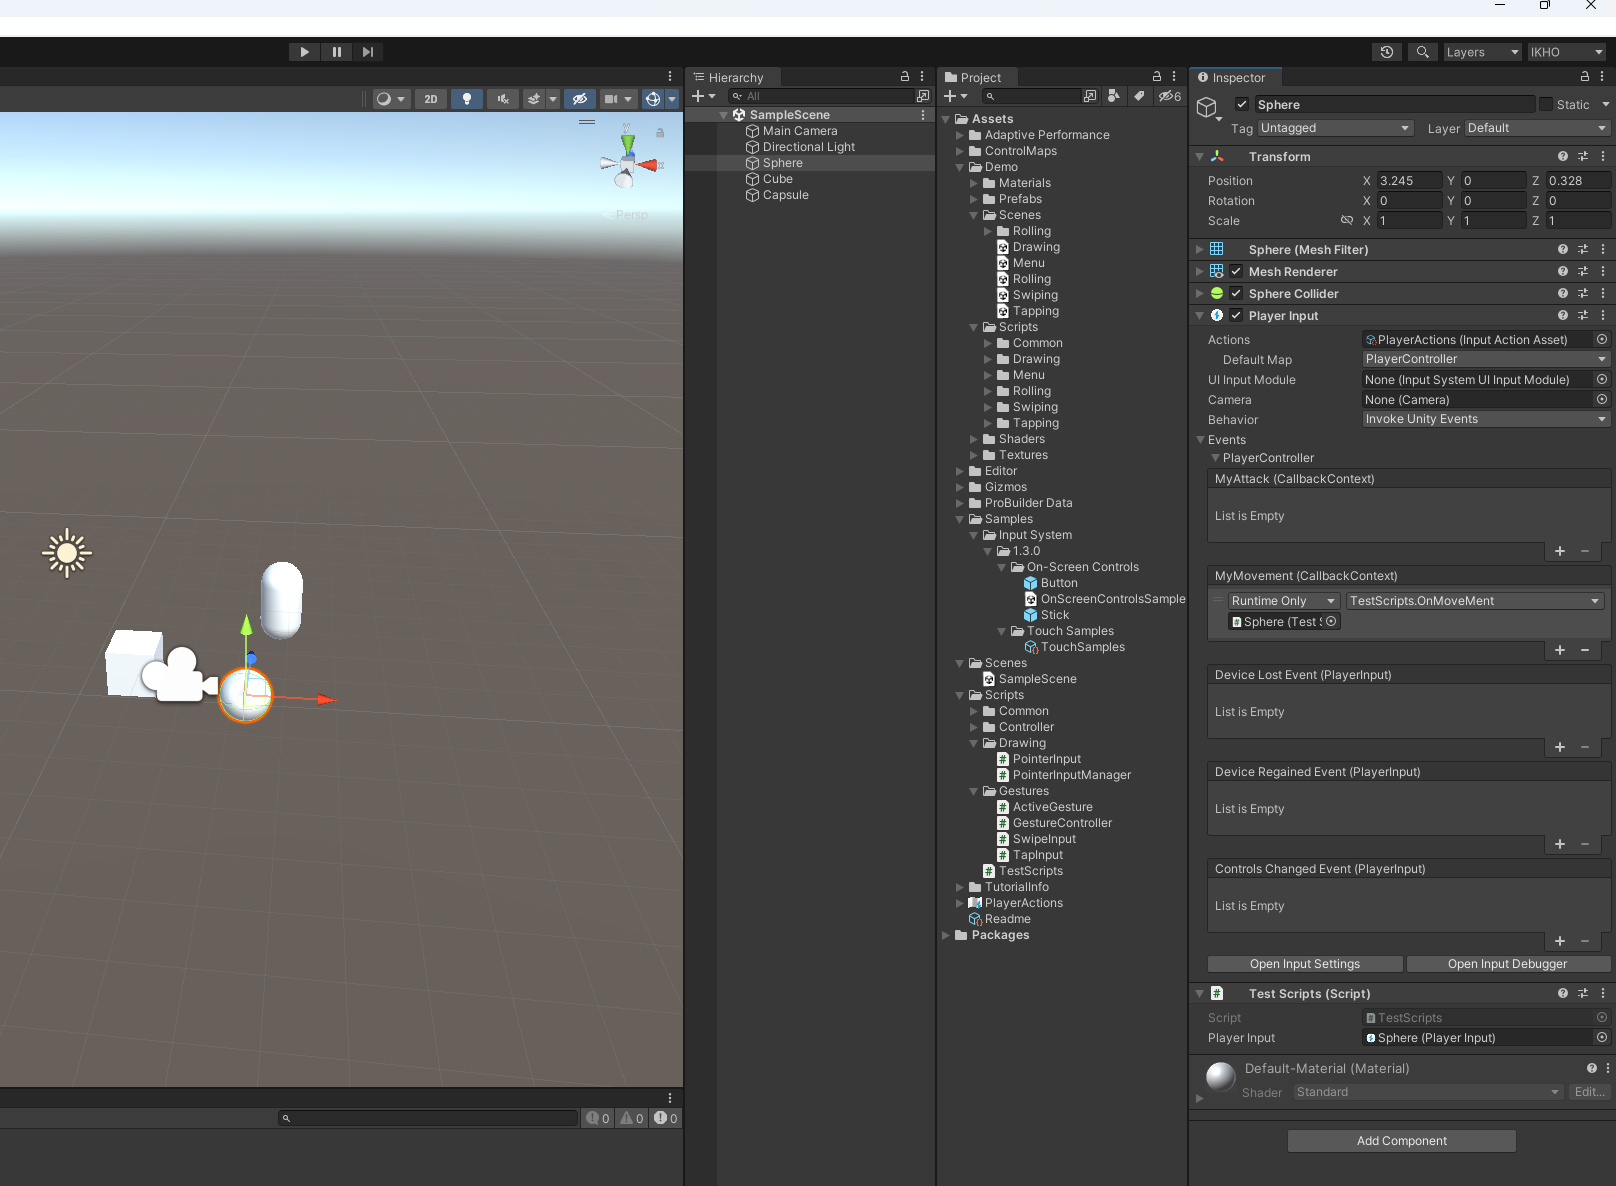
새로운 프로젝트를 생성하고 지금까지 한 내용을 적용
using System.Collections;
using System.Collections.Generic;
using UnityEngine;
using UnityEngine.InputSystem;

public class TestScripts : MonoBehaviour
{
    public PlayerInput playerInput;

    public void OnMoveMent(InputAction.CallbackContext value)
    {
        Vector2 inputMovement = value.ReadValue<Vector2>();
        if (inputMovement != null)
        {
            this.gameObject.transform.Translate(inputMovement.x, 0, inputMovement.y);
        }
    }
}