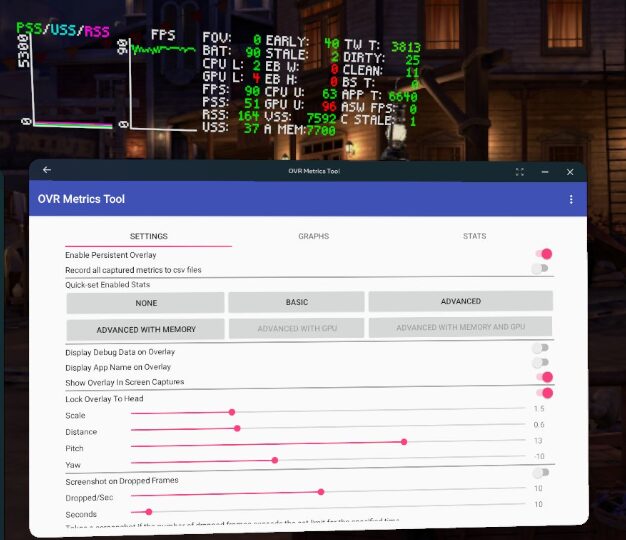
OVR Metrics Tool
https://www.meta.com/ko-kr/experiences/ovr-metrics–tool/2372625889463779

https://developers.meta.com/horizon/documentation/unity/ts-ovrmetricstool – DOCS

New in OVR Metrics Tool 1.5
(OVR Metrics Tool 1.5의 새로운 기능)
The following statistics were introduced in OVR Metrics Tool 1.5.
(다음 통계는 OVR Metrics Tool 1.5에 도입되었습니다.)
These statistics are not enabled with either the Basic or Advanced buttons.
(이러한 통계는 Basic 또는 Advanced 버튼으로 활성화되지 않습니다.)
| Statistic | Description |
| Boundary GPU Time (경계 GPU 시간) | Displays the Boundary GPU time, which is the amount of GPU time used by the boundary rendering. (경계 렌더링에 사용되는 GPU 시간인 경계 GPU 시간을 표시합니다.) |
| CPU Utilization Core 0-7 (CPU 사용률 코어 0-7) | Displays the individual CPU core utilization. Applications are limited to cores 5, 6, and 7. (개별 CPU 코어 사용률을 표시합니다. 응용 프로그램은 코어 5, 6, 7로 제한됩니다.) |
| Application VSS, RSS, and Dalvik PSS (응용 프로그램 VSS, RSS 및 Dalvik PSS) | Memory statistics to give additional insight into memory usage. (메모리 사용에 대한 추가적인 통찰력을 제공하는 메모리 통계입니다.) |
Statistics Enabled with ovrgpuprofiler
(ovrgpuprofiler로 활성화되는 통계)
The following statistics are not enabled with either the Basic or Advanced buttons, and require that ovrgpuprofiler has been enabled from a connected shell.
(다음 통계들은 Basic 또는 Advanced 버튼으로는 활성화되지 않으며, 연결된 셸에서 ovrgpuprofiler 를 활성화해야 사용할 수 있습니다.)
| Statistic | Description |
| Average Vertices Per Frame (프레임당 평균 정점 수) | Shows the approximate number of vertices shaded per frame. Note that boundary and system overlays will affect this number. (프레임당 셰이딩된 대략적인 정점 수를 보여줍니다. 경계 및 시스템 오버레이가 이 수치에 영향을 줄 수 있습니다.) |
| Average Fill Percentage per Eye (눈당 평균 채우기 비율) | An estimate for the average amount of overdraw, based on the number of fragments shaded per frame divided by the eye buffer resolution. (프레임당 셰이딩된 프래그먼트 수를 눈 버퍼 해상도로 나눈 값을 기반으로 한 평균 오버드로우 추정치입니다.) 100 represents touching every pixel in the eye buffer only once. (100은 눈 버퍼의 모든 픽셀을 한 번만 터치했음을 나타냅니다. ) Note that boundary and system overlays will affect this number. (경계 및 시스템 오버레이가 이 수치에 영향을 줄 수 있습니다.) |
| Average Instructions per Fragment (프래그먼트당 평균 명령어 수) | Shows the average number of instructions for every shaded fragment. (셰이딩된 모든 프래그먼트에 대한 평균 명령어 수를 보여줍니다.) |
| Average Instructions per Vertex (정점당 평균 명령어 수) | Shows the average number of instructions for every shaded vertex (셰이딩된 모든 정점에 대한 평균 명령어 수를 보여줍니다.) |
| Average Textures per Fragment (프래그먼트당 평균 텍스처 수) | Shows the average number of textures for each fragment. (각 프래그먼트에 대한 평균 텍스처 수를 보여줍니다.) |
| Percentage Time Shading Fragments (프래그먼트 셰이딩 시간 비율) | Shows the percentage of GPU time spent shading fragments. (프래그먼트 셰이딩에 사용된 GPU 시간의 비율을 보여줍니다.) |
| Percentage Time Shading Vertices (정점 셰이딩 시간 비율) | Shows the percentage of GPU time spent shading vertices. (정점 셰이딩에 사용된 GPU 시간의 비율을 보여줍니다.) |
| Vertex Fetch Stall Percentage (정점 가져오기 지연 비율) | Percentage of clock cycles where the GPU cannot make any more requests for vertex data. (GPU가 정점 데이터에 대한 추가 요청을 할 수 없는 클럭 사이클의 비율입니다.) |
| Texture Fetch Stall Percentage (텍스처 가져오기 지연 비율) | Percentage of clock cycles where the shader processors cannot make any more requests for texture data. (셰이더 프로세서가 텍스처 데이터에 대한 추가 요청을 할 수 없는 클럭 사이클의 비율입니다.) |
| L1 Texture Miss Percentage (L1 텍스처 미스 비율) | Percentage of texture requests to L1 cache that miss the cache. (L1 캐시에 대한 텍스처 요청 중 캐시 미스의 비율입니다.) |
| L2 Texture Miss Percentage (L2 텍스처 미스 비율) | Percentage of texture requests to L2 cache that miss the cache. (L2 캐시에 대한 텍스처 요청 중 캐시 미스의 비율입니다.) |
| Texture Sample Percentage Using Nearest Filtering (최근접 필터링을 사용하는 텍스처 샘플 비율) | Percent of texture fetches that use the nearest sampling method. (최근접 샘플링 방법을 사용하는 텍스처 가져오기의 비율입니다.) |
| Texture Sample Percentage Using Linear Filtering (선형 필터링을 사용하는 텍스처 샘플 비율) | Percent of texture fetches that use the linear sampling method. (선형 샘플링 방법을 사용하는 텍스처 가져오기의 비율입니다.) |
| Texture Sample Percentage Using Anisotropic Filtering (비등방성 필터링을 사용하는 텍스처 샘플 비율) | Percent of texture fetches that use the anisotropic sampling method. (비등방성 샘플링 방법을 사용하는 텍스처 가져오기의 비율입니다.) |
Basic Statistics
(기본 통계)
This section contains statistics that are tracked when the Basic button is selected.
(이 section에는 Basic 버튼을 선택했을 때 추적되는 통계가 포함되어 있습니다. )
These contain most of the important info that developers should track in regards to performance.
(이는 개발자들이 성능과 관련하여 추적해야 할 대부분의 중요한 정보를 담고 있습니다.)
| Statistic | Description |
Stale Frame Count (STALE)오래된 프레임 수 (STALE) | Shows the number of stale frames. ( 오래된 프레임의 수를 보여줍니다.) This indicates the number of times a frame wasn’t delivered on time, and the previous frame was used instead. (이는 프레임이 제 시간에 전달되지 않아 이전 프레임이 대신 사용된 횟수를 나타냅니다.) Because the CPU and GPU are working in parallel, sometimes rendering a frame takes longer than a single frame’s total time length, but neither the CPU or GPU take longer than a frame individually themselves. (CPU와 GPU가 병렬로 작업하기 때문에, 때로는 한 프레임을 렌더링하는 데 전체 프레임 시간보다 오래 걸리지만, CPU나 GPU 각각은 개별적으로 한 프레임 시간을 초과하지 않을 수 있습니다. ) Therefore, it is possible for an app to run at 72 FPS, but have 72 stale frames per second. (따라서 앱이 72 FPS로 실행되면서도 초당 72개의 오래된 프레임이 발생할 수 있습니다.) In such situations, the latency between rendering and display time will be higher, but the release tempo of frames will be steady. (이런 상황에서는 렌더링과 표시 시간 사이의 지연이 더 길어지지만, 프레임 출력 템포는 일정하게 유지됩니다.) Stale frames become an issue when the value is greater than 0 and less than the refresh rate. (오래된 프레임은 그 값이 0보다 크고 화면 주사율보다 작을 때 문제가 됩니다.) At this point, some frames are displayed twice in a row, some frames are skipped, and the user will have a poor experience. (이 경우, 일부 프레임은 연속으로 두 번 표시되고, 일부는 건너뛰게 되어 사용자 경험이 저하됩니다.) Extra latency mode can be used in such situations. (이런 상황에서는 추가 지연 모드를 사용할 수 있습니다.) This feature, which is on by default in Unity and Unreal Engine) tells ATW to always wait an extra frame, and not to consider frames stale unless they aren’t ready after the second frame. (이 기능은 Unity와 Unreal Engine에서 기본적으로 활성화되어 있으며, ATW(Asynchronous TimeWarp)에게 항상 한 프레임을 더 기다리도록 지시하고, 두 번째 프레임 이후에도 준비되지 않은 경우에만 프레임을 오래된 것으로 간주합니다.) If the app does render quickly, the frame will be considered early, but everything will look smooth. (앱이 빠르게 렌더링되면 프레임은 이른 것으로 간주되지만, 모든 것이 부드럽게 보일 것입니다.) For further reading on how stale frames work, read the blog post Understanding Gameplay Latency for Meta Quest, Oculus Go and Gear VR. (오래된 프레임의 작동 방식에 대해 더 자세히 알고 싶다면, “Understanding Gameplay Latency for Meta Quest, Oculus Go and Gear VR” 블로그 포스트를 참조하세요.) |
App GPU Time (APP T)앱 GPU 시간 (APP T) | Displays the app GPU time (in μs, 1/1000th ms), which is the amount of time the application spends rendering a single frame. (앱 GPU 시간을 마이크로초(μs, 1/1000 밀리초) 단위로 표시합니다. 이는 애플리케이션이 단일 프레임을 렌더링하는 데 소요하는 시간입니다.) This value is one of the most useful numbers to monitor when optimizing an application. (이 값은 애플리케이션을 최적화할 때 모니터링해야 할 가장 유용한 수치 중 하나입니다.) If the length of time shown is longer than a single frame’s length (13.88ms for 72 frames per second), the app is GPU bound. (표시된 시간이 단일 프레임 길이(72 프레임/초의 경우 13.88ms)보다 길다면, 앱은 GPU 바운드 상태입니다.) If the length is less than a frame’s length, the app is probably CPU bound. (프레임 길이보다 짧다면, 앱은 아마도 CPU 바운드 상태일 것입니다.) In addition to using this metric to determine if an app is GPU or CPU bound, it’s also useful to monitor it as you change shaders, add textures, change meshes, and make other changes. (이 메트릭은 앱이 GPU 바운드인지 CPU 바운드인지 판단하는 데 사용될 뿐만 아니라, 셰이더 변경, 텍스처 추가, 메시 변경 등의 작업을 수행할 때 모니터링하는 데도 유용합니다.) This can allow insight into how much headroom remains on the GPU, and if debug logic is used to turn on and off specific objects, you can tell how performance-intensive those objects are. ()이를 통해 GPU에 남아있는 여유 공간을 파악할 수 있으며, 디버그 로직을 사용하여 특정 객체를 켜고 끄면 해당 객체가 얼마나 성능 집약적인지 알 수 있습니다. |
GPU Utilization (GPU U)GPU 사용률 (GPU U) | Displays the GPU utilization percentage. If this value is maxed 100%, the app is GPU bound. (GPU 사용률을 백분율로 표시합니다. 이 값이 100%에 도달하면 앱은 GPU 바운드 상태입니다.) Performance issues due to scheduling may occur if this number is over 90%. (이 수치가 90%를 초과하면 스케줄링으로 인한 성능 문제가 발생할 수 있습니다.) |
CPU Utilization (CPU U)CPU 사용률 (CPU U) | Displays the CPU utilization percentage. (CPU 사용률을 백분율로 표시합니다.) However, this metric represents the worst performing core, and since most apps are multithreaded, and the scheduler assigns threads as they are available, the main thread of the app may not be represented in this metric. (하지만 이 메트릭은 가장 성능이 낮은 코어를 나타내며, 대부분의 앱이 멀티스레드이고 스케줄러가 사용 가능한 대로 스레드를 할당하기 때문에 앱의 메인 스레드가 이 메트릭에 반영되지 않을 수 있습니다.) |
CPU Level (CPU L)GPU Level ( GPU L)CPU 레벨 (CPU L) GPU 레벨 (GPU L) | These metrics specify the CPU and GPU clock levels set by the app. (이 메트릭들은 앱에 의해 설정된 CPU와 GPU 클럭 레벨을 지정합니다.) While these levels can be set manually, use of dynamic clock throttling, which increases these numbers if the app is not hitting frame rate at a requested level, is recommended. (이 레벨들은 수동으로 설정할 수 있지만, 요청된 레벨에서 프레임 속도를 달성하지 못할 경우 이 수치를 증가시키는 동적 클럭 조절 사용을 권장합니다.) If an app is not making frame rate, reviewing the clock levels can help quickly indicate if performance is CPU or GPU bound, providing a target area for optimization. (앱이 프레임 속도를 달성하지 못하는 경우, 클럭 레벨을 검토하면 성능이 CPU 바운드인지 GPU 바운드인지 빠르게 파악할 수 있어 최적화 대상 영역을 제공합니다.) For example, if an app with performance issues is at CPU 4 and GPU 2, the app must be CPU bound since there is still available GPU overhead. (예를 들어, 성능 문제가 있는 앱이 CPU 4와 GPU 2에 있다면, GPU에 여전히 여유가 있으므로 앱은 CPU 바운드 상태여야 합니다.) However, if both levels are 4 and the app has issues, this number is not as useful, and other metrics should be used to find potential areas for optimization, such as stale frames, app GPU time, and CPU/GPU utilization. (그러나 두 레벨이 모두 4이고 앱에 문제가 있다면, 이 수치는 유용하지 않으며 오래된 프레임, 앱 GPU 시간, CPU/GPU 사용률 등 다른 메트릭을 사용하여 잠재적인 최적화 영역을 찾아야 합니다.) For more information on the CPU and GPU clock levels, see Power Management. (CPU 및 GPU 클럭 레벨에 대한 자세한 정보는 전원 관리 섹션을 참조하세요.) |
Average FPS (FPS)평균 FPS (FPS) | Displays the frame rate in frames per second. (초당 프레임 수로 프레임 속도를 표시합니다.) A well-performing app should target the refresh rate of the display. See Refresh Rate for more information. (성능이 좋은 앱은 디스플레이의 주사율을 목표로 해야 합니다. 자세한 내용은 주사율 섹션을 참조하세요.) |
Available Memory (A MEM)사용 가능한 메모리 (A MEM) | Indicates the available memory in MB as reported by Android. (Android에서 보고한 대로 사용 가능한 메모리를 MB 단위로 나타냅니다.) On Android, memory is handled in a somewhat opaque way, which makes this value useful for only general guidance. (Android에서는 메모리가 다소 불투명한 방식으로 처리되므로, 이 값은 일반적인 지침으로만 유용합니다.) For example, if an app goes to the background, the newly foregrounded app and OS operations will pull a lot of memory, and it may crash your app even if Free is reporting that there is memory available. (예를 들어, 앱이 백그라운드로 전환되면 새로 포그라운드로 전환된 앱과 OS 작업이 많은 메모리를 사용하게 되어, Free가 사용 가능한 메모리가 있다고 보고하더라도 앱이 충돌할 수 있습니다.) This value is most useful as a way to monitor whether memory is being allocated faster than expected, or if memory isn’t being released when expected. (이 값은 예상보다 빠르게 메모리가 할당되고 있는지, 또는 예상할 때 메모리가 해제되지 않는지를 모니터링하는 방법으로 가장 유용합니다.) |
Advanced Statistics
(고급 통계)
This section contains statistics that are tracked when the Advanced button is selected.
(이 섹션에는 Advanced 버튼을 선택했을 때 추적되는 통계가 포함되어 있습니다.)
When selected, all Basic metrics are tracked as well.
(선택 시 모든 기본 메트릭도 함께 추적됩니다. )
These metrics are mainly useful to verify that behavior conforms to expectations based on choices during development.
(이러한 메트릭은 주로 개발 중 선택한 사항들에 기반한 예상 동작을 확인하는 데 유용합니다.)
| Statistic | Description |
Foveation Level (FOV)Foveation 레벨 (FOV) | Indicates the level of Fixed Foveated Rendering (FFR) intensity. (Fixed Foveated Rendering(FFR) 강도 수준을 나타냅니다.) This feature can be used to render the edges of your eye textures at a lower resolution than the center, lowering the fidelity of the scene in the viewer’s peripheral vision while reducing the GPU load. (이 기능은 눈 텍스처의 가장자리를 중앙보다 낮은 해상도로 렌더링하여 시청자의 주변 시야에서 장면의 fidelity를 낮추면서 GPU 부하를 줄이는 데 사용될 수 있습니다.) This number has direct GPU performance implications, and there will be noticeable visible artifacts on the edge of the screen at higher levels. (이 수치는 GPU 성능에 직접적인 영향을 미치며, 높은 수준에서는 화면 가장자리에 눈에 띄는 가시적 아티팩트가 발생합니다.) Pick the most visually acceptable level for the performance increase needed. (필요한 성능 향상을 위해 시각적으로 가장 받아들일 만한 수준을 선택하세요.) For more information and recommendations, see Fixed Foveated Rendering (FFR). (자세한 정보와 권장 사항은 Fixed Foveated Rendering (FFR) 섹션을 참조하세요.) |
Eye Buffer Width (EBW)Eye Buffer Height ( EBH)눈 버퍼 너비 (EBW) 눈 버퍼 높이 (EBH) | This is the resolution of the texture to which the app is rendering. (앱이 렌더링하는 텍스처의 해상도입니다.) The default for Meta Quest is 1216×1344. (Meta Quest의 기본값은 1216×1344입니다.) This is useful to verify expectations and to confirm the aspect ratio is correct for the field of view. (이는 예상을 확인하고 종횡비가 시야각에 맞는지 확인하는 데 유용합니다.) Resolution has a direct impact on GPU rendering time, where more pixels means more time in fragment shaders. (해상도는 GPU 렌더링 시간에 직접적인 영향을 미치며, 더 많은 픽셀은 fragment shaders에서 더 많은 시간을 의미합니다.) |
Early Frame Count (EARLY)조기 프레임 수 (EARLY) | Shows the number of early frames. (조기 프레임의 수를 보여줍니다.) This indicates the number of frames delivered before they were needed. (이는 필요하기 전에 전달된 프레임의 수를 나타냅니다.) Early frames are possible when extra latency mode is being used. (조기 프레임은 추가 지연 모드가 사용될 때 가능합니다.) When a few early frames can be ignored, but if this number is persistently high, make sure the CPU and GPU levels aren’t set higher than necessary. (몇 개의 조기 프레임은 무시할 수 있지만, 이 수가 지속적으로 높다면 CPU와 GPU 레벨이 필요 이상으로 높게 설정되지 않았는지 확인하세요.) If the number of early frames matches the FPS, it’s recommended to either turn off extra latency mode, or take advantage of the headroom by increasing the resolution or shader complexity. (조기 프레임 수가 FPS와 일치한다면, 추가 지연 모드를 끄거나 여유 공간을 활용하여 해상도나 셰이더 복잡도를 높이는 것이 좋습니다.) |
Used Memory (U MEM)사용된 메모리 (U MEM) | Indicates the memory used in MB as reported by Android. (Android에서 보고한 대로 사용된 메모리를 MB 단위로 나타냅니다.) Because apps can share memory in Android, this number reports proportional set size (PSS) memory, meaning that this value adds all the unique memory used by the app, and a fractional part of shared memory based on how many apps are sharing it. (Android에서 앱들이 메모리를 공유할 수 있기 때문에, 이 수치는 비례 집합 크기(PSS) 메모리를 보고합니다. 즉, 이 값은 앱이 사용하는 모든 고유 메모리와 공유 메모리의 일부분(공유하는 앱의 수에 따라 분할)을 더합니다.) This makes the number useful in tracking relative memory allocation for your app, but not very useful in showing true memory footprint. (이는 앱의 상대적인 메모리 할당을 추적하는 데 유용하지만, 실제 메모리 사용량을 보여주는 데는 그다지 유용하지 않습니다.) |
Extra Latency Mode (LAT)추가 지연 모드 (LAT) | Indicates whether extra latency mode is enabled. (추가 지연 모드가 활성화되었는지 여부를 나타냅니다.) This feature tells ATW to always wait an extra frame and use the previously submitted frame. (이 기능은 ATW에게 항상 추가 프레임을 기다리고 이전에 제출된 프레임을 사용하도록 지시합니다.) This allows usage of the whole frame for CPU and GPU, making it easier to hit frame targets with the downside of the loss of one frame of latency. (이를 통해 CPU와 GPU에 전체 프레임을 사용할 수 있게 되어 프레임 목표를 더 쉽게 달성할 수 있지만, 한 프레임의 지연이 발생하는 단점이 있습니다.) Extra latency mode can make hitting performance targets easier, and its use is highly recommended. (추가 지연 모드는 성능 목표 달성을 더 쉽게 만들 수 있으며, 사용을 강력히 권장합니다.) Extra latency mode is enabled by default when developing with Unity and Unreal Engine. (Unity와 Unreal Engine으로 개발할 때 추가 지연 모드는 기본적으로 활성화됩니다.) For native mobile development, enable extra latency mode with vrapi_SetExtraLatencyMode. (네이티브 모바일 개발의 경우, vrapi_SetExtraLatencyMode로 추가 지연 모드를 활성화하세요.) |
Average Prediction (PRED)평균 예측 (PRED) | Shows the prediction time. (예측 시간을 보여줍니다.) This is the absolute time between when an app queries the pose before rendering and the time the frame is displayed on the HMD screen. (이는 앱이 렌더링 전에 포즈를 쿼리하는 시점부터 프레임이 HMD 화면에 표시되는 시점까지의 절대 시간입니다.) This should almost always be a fixed number between 45ms and 50ms. (이 값은 거의 항상 45ms에서 50ms 사이의 고정된 수치여야 합니다. ) If this number is much higher than expected, the app likely has latency issues when rendering. (이 수치가 예상보다 훨씬 높다면, 앱이 렌더링 시 지연 문제가 있을 가능성이 높습니다.) |
TimeWarp GPU Time (TW T)TimeWarp GPU 시간 (TW T) | Displays the ATW GPU time (in μs, 1/1000th ms), which is the amount of time ATW takes to render. (ATW GPU 시간을 마이크로초(μs, 1/1000 밀리초) 단위로 표시합니다, 이는 ATW가 렌더링하는 데 걸리는 시간입니다.) This time directly correlates to the number of layers used and their complexity, with equirect and cylinder layers being more expensive on the GPU than quad and projection layers. (이 시간은 사용된 레이어의 수와 복잡도에 직접적으로 연관되며, equirect와 cylinder 레이어가 quad와 projection 레이어보다 GPU에 더 부담이 됩니다.) This value may be useful to video apps because ATW taking too long can result in screen tearing in playback. (이 값은 비디오 앱에 유용할 수 있습니다. ATW가 너무 오래 걸리면 재생 중 화면 찢김 현상이 발생할 수 있기 때문입니다.) |
Additional Useful Statistics
(추가 유용한 통계)
In addition to those tracked by the Basic and Advanced buttons, the statistics in this section may also provide utility to developers.
(Basic과 Advanced 버튼으로 추적되는 통계 외에도, 이 섹션의 통계는 개발자에게 유용할 수 있습니다.)
| Statistic | Description |
Screen Tear Count (TEARS)화면 찢김 수 (TEARS) | Shows the number of screen tears. (화면 찢김의 수를 보여줍니다.) This reports when Asynchronous TimeWarp (ATW) takes too long and experiences a screen tear. (이는 비동기 TimeWarp(ATW)가 너무 오래 걸려 화면 찢김을 경험할 때 보고됩니다.) Screen tears should not happen on Meta Quest apps unless too many layers are being used. (Meta Quest 앱에서는 너무 많은 레이어가 사용되지 않는 한 화면 찢김이 발생해서는 안 됩니다.) This might occur if quad or cylinder layers are being used to display UI elements, or if multiple overlapping equirect video layers are displayed. (이는 UI 요소를 표시하기 위해 quad나 cylinder 레이어를 사용하거나, 여러 개의 겹치는 equirect 비디오 레이어가 표시될 때 발생할 수 있습니다.) |
Swap Interval (SWAP)Swap 간격 (SWAP) | Shows the swap interval, which tells the app how many frames to skip before rendering the next frame. (스왑 간격을 보여줍니다. 이는 앱에게 다음 프레임을 렌더링하기 전에 몇 개의 프레임을 건너뛸지 알려줍니다.) This will almost always be 1, as a value of 2 can cause the app to render at half frame rate, which can be uncomfortable with 6DOF movement. (이 값은 거의 항상 1이어야 합니다. 2로 설정하면 앱이 절반의 프레임 속도로 렌더링될 수 있어 6DOF 움직임에서 불편할 수 있습니다.) This may be set to 2 for debugging purposes, but this setting should never be used in a published app because it’s noticeable whenever the user turns their head. (디버깅 목적으로 2로 설정될 수 있지만, 사용자가 머리를 돌릴 때마다 눈에 띄기 때문에 출시된 앱에서는 절대 사용해서는 안 됩니다.) |
Display Refresh Rate (DRR)디스플레이 주사율 (DRR) | Shows what the refresh rate of the display is currently set to. This value can be 60 or 72. See Refresh Rate for more information, (디스플레이의 현재 주사율을 보여줍니다. 이 값은 60 또는 72일 수 있습니다. 자세한 내용은 Refresh Rate을 참조하세요.) |
Battery Level (BAT)배터리 레벨 (BAT) | Shows the remaining battery level percentage. (남은 배터리 레벨 백분율을 보여줍니다.) |
Other Statistics
(기타 통계)
This section contains statistics that were relevant to older hardware, and should not be a concern for Meta Quest.
(이 섹션에는 이전 하드웨어에 관련된 통계가 포함되어 있으며, Meta Quest에서는 크게 신경 쓰지 않아도 됩니다.)
| Statistic | Description |
Sensor Temperature (TEMP)센서 온도 (TEMP) | Shows the sensor temperature in Celsius. 센서 온도를 섭씨로 보여줍니다. This was specifically important for phone-based VR development. (이는 특히 폰 기반 VR 개발에 중요했습니다.) For temperature concerns on current headsets, Power Level can be used as an indicator of when temperature is affecting the headsets’s performance. (현재 헤드셋의 온도 문제에 대해서는, 전력 레벨을 온도가 헤드셋의 성능에 영향을 미치는 시점의 지표로 사용할 수 있습니다.) |
Power Level (POW L)전력 레벨 (POW L) | Indicates the current power level of the headset. (헤드셋의 현재 전력 레벨을 나타냅니다.) The reported levels are 0 (NORMAL), 1 (SAVE), and 2 (DANGER). (보고되는 레벨은 0 (정상), 1 (절약), 2 (위험)입니다.) As the headset heats up, the power level will automatically change from NORMAL, to SAVE, and eventually to DANGER. Once DANGER is reached, an overheat dialog is displayed. (헤드셋이 가열됨에 따라 전력 레벨은 자동으로 정상에서 절약으로, 그리고 결국 위험으로 변경됩니다. 위험에 도달하면 과열 대화 상자가 표시됩니다.) Applications should monitor the power level and change their behavior to reduce rendering costs when it enters power save mode. For more information on this topic, see Power Management. (애플리케이션은 전력 레벨을 모니터링하고 절전 모드에 들어갈 때 렌더링 비용을 줄이도록 동작을 변경해야 합니다. 이 주제에 대한 자세한 내용은 Power Management을 참조하세요.) |
CPU Frequency (CPU F)GPU Frequency ( GPU F)Mem Frequency ( MEM F)CPU 주파수 (CPU F) GPU 주파수 (GPU F) 메모리 주파수 (MEM F) | These metrics display the clock speeds of the CPU, GPU, and memory. (이 메트릭들은 CPU, GPU, 메모리의 클럭 속도를 표시합니다.) The CPU and GPU speeds change whenever their CPU Level and GPU Level change, which makes them more useful to monitor since they can be directly adjusted and changed. (CPU와 GPU 속도는 CPU 레벨과 GPU 레벨이 변경될 때마다 바뀌므로, 직접 조정하고 변경할 수 있기 때문에 모니터링하는 것이 더 유용합니다.) The clock speeds tied to those levels vary with different SoC’s, and the frequencies cannot be changed. (이 레벨에 연결된 클럭 속도는 다른 SoC에 따라 다르며, 주파수는 변경할 수 없습니다.) |
Battery Temperature (B TEM)배터리 온도 (B TEM) | Shows the battery temperature in Celsius. (배터리 온도를 섭씨로 보여줍니다.) This was specifically important for phone-based VR development. (이는 특히 폰 기반 VR 개발에 중요했습니다.) For temperature concerns on current headsets, Power Level can be used as an indicator of when temperature is affecting the headset’s performance. (현재 헤드셋의 온도 문제에 대해서는, 전력 레벨을 온도가 헤드셋의 성능에 영향을 미치는 시점의 지표로 사용할 수 있습니다.) |
Battery Current Now (BAT C)현재 배터리 전류 (BAT C) | Shows the current coming from the battery in milliamps. (배터리에서 나오는 전류를 밀리암페어 단위로 보여줍니다.) Developers should optimize against the CPU and GPU levels rather than attempt to use this metric to determine battery drain. (개발자는 이 메트릭을 사용하여 배터리 소모를 결정하려고 하기보다는 CPU와 GPU 레벨에 대해 최적화해야 합니다.) |
Power Voltage (POW V)전원 전압 (POW V) | Indicates the power voltage in milliamps. (전원 전압을 밀리볼트 단위로 나타냅니다.) |
Power Current (POW C)전원 전류 (POW C) | Shows the power current of the headset in milliamps. (헤드셋의 전원 전류를 밀리암페어 단위로 보여줍니다.) Developers should optimize against the CPU and GPU levels rather than attempt to use this metric to determine power drain. (개발자는 이 메트릭을 사용하여 전력 소모를 결정하려고 하기보다는 CPU와 GPU 레벨에 대해 최적화해야 합니다.) |
Left Controller Temperature (LC TM)Right Controller Temperature ( RC TM)왼쪽 컨트롤러 온도 (LC TM) 오른쪽 컨트롤러 온도 (RC TM) | These metrics display the temperatures of the left and right controllers. (이 메트릭들은 왼쪽과 오른쪽 컨트롤러의 온도를 표시합니다.) |
Maximum Rotational Speed (M ROT)최대 회전 속도 (M ROT) | Specifies the fastest speed the headset has rotated. 헤드셋이 회전한 가장 빠른 속도를 지정합니다. |