유니티의 ML-Agents 2.0 TUTORIAL 영상을 대략적인 정리한 글입니다.
Version : Unity 2021.3.5f1
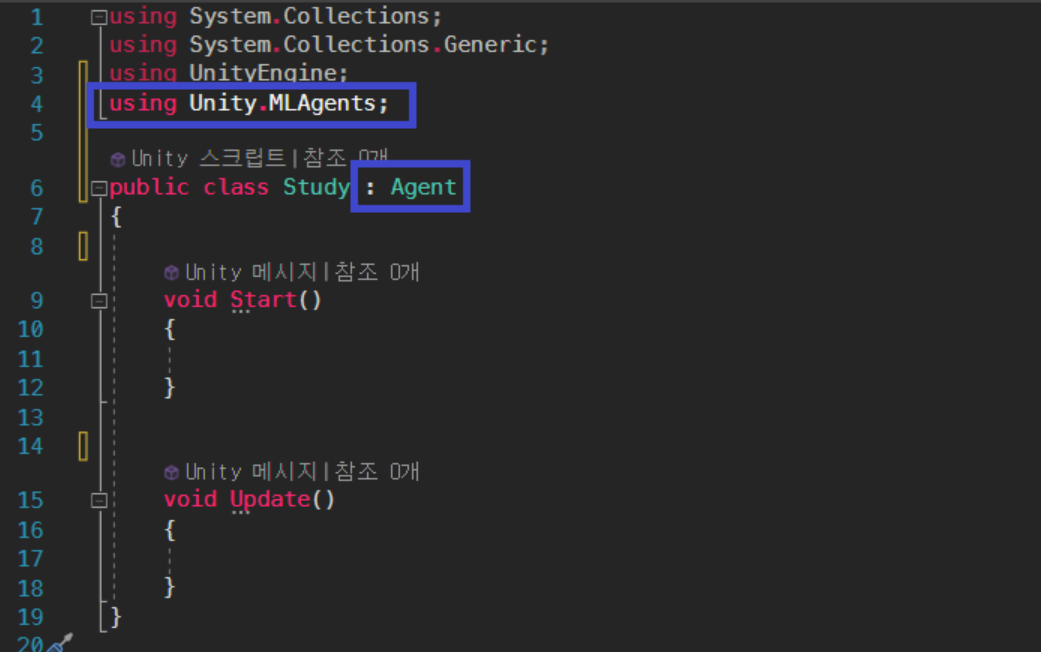
using Unity.MLAgents;
Agent 를 상속 받는다.
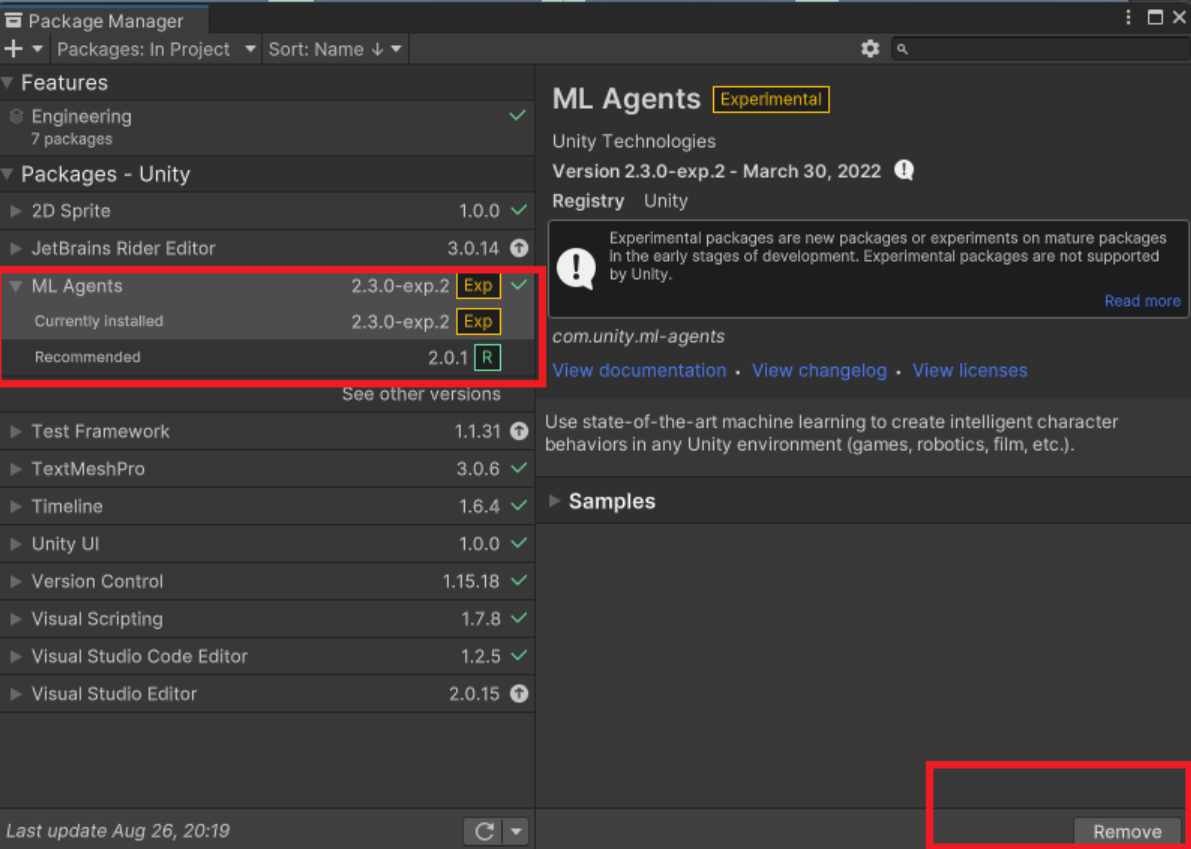
Agent 가 빨간줄로 표시되면 PackageManger 에서 우측 하단부의 Remove 버튼 대신에 업데이트를 눌러주면 해결된다.

Agent를 상속받은 스크립트를 가진 오브젝트는
Behavior Parameters
Agent를 상속받은 Script
Decision Requester
이 세가지를 필수로 가지고 있어야 한다.
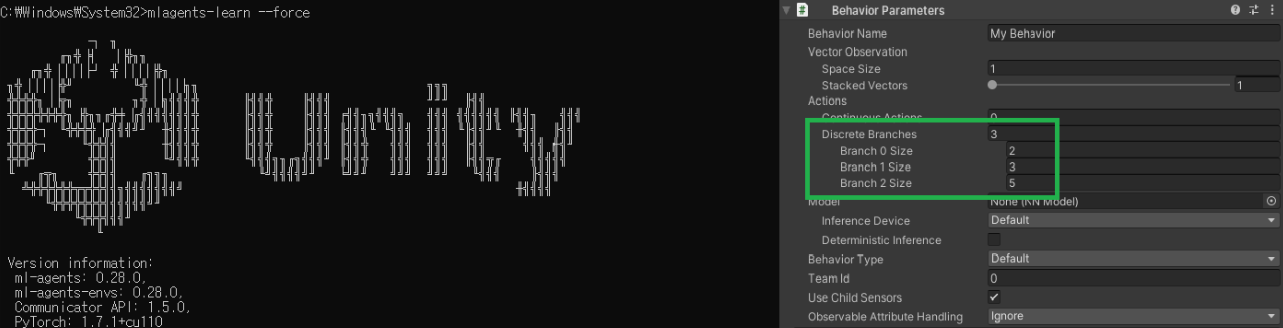
CMD 에서 확인
(디폴트된 런아이들을 사용)
mlagents-learn --force
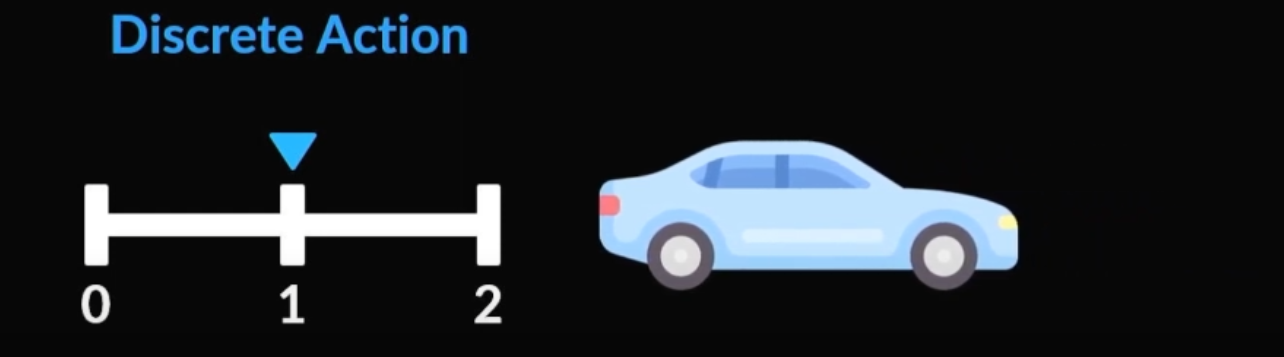
DiscreteActions : 개별 작업
정수를 반환하기 때문에 참 / 거짓 Bool로 구현하기가 쉽고
특정한 행동에 사용하기가 좋다.
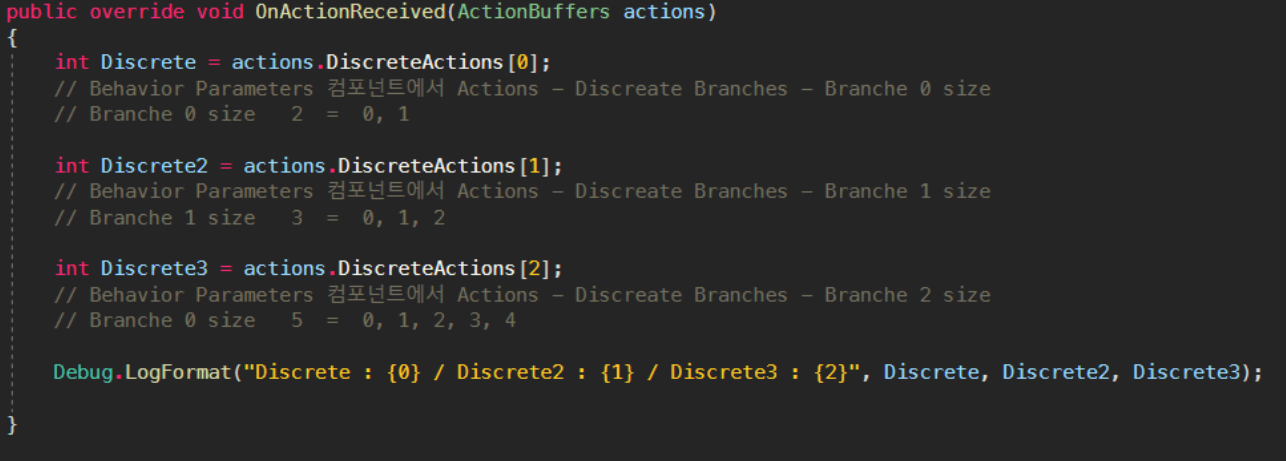
public override void OnActionReceived(ActionBuffers actions)
{
int Discrete = actions.DiscreteActions[0];
// Behavior Parameters 컴포넌트에서 Actions - Discreate Branches - Branche 0 size
// Branche 0 size 2 = 0, 1
int Discrete2 = actions.DiscreteActions[1];
// Behavior Parameters 컴포넌트에서 Actions - Discreate Branches - Branche 1 size
// Branche 1 size 3 = 0, 1, 2
int Discrete3 = actions.DiscreteActions[2];
// Behavior Parameters 컴포넌트에서 Actions - Discreate Branches - Branche 2 size
// Branche 0 size 5 = 0, 1, 2, 3, 4
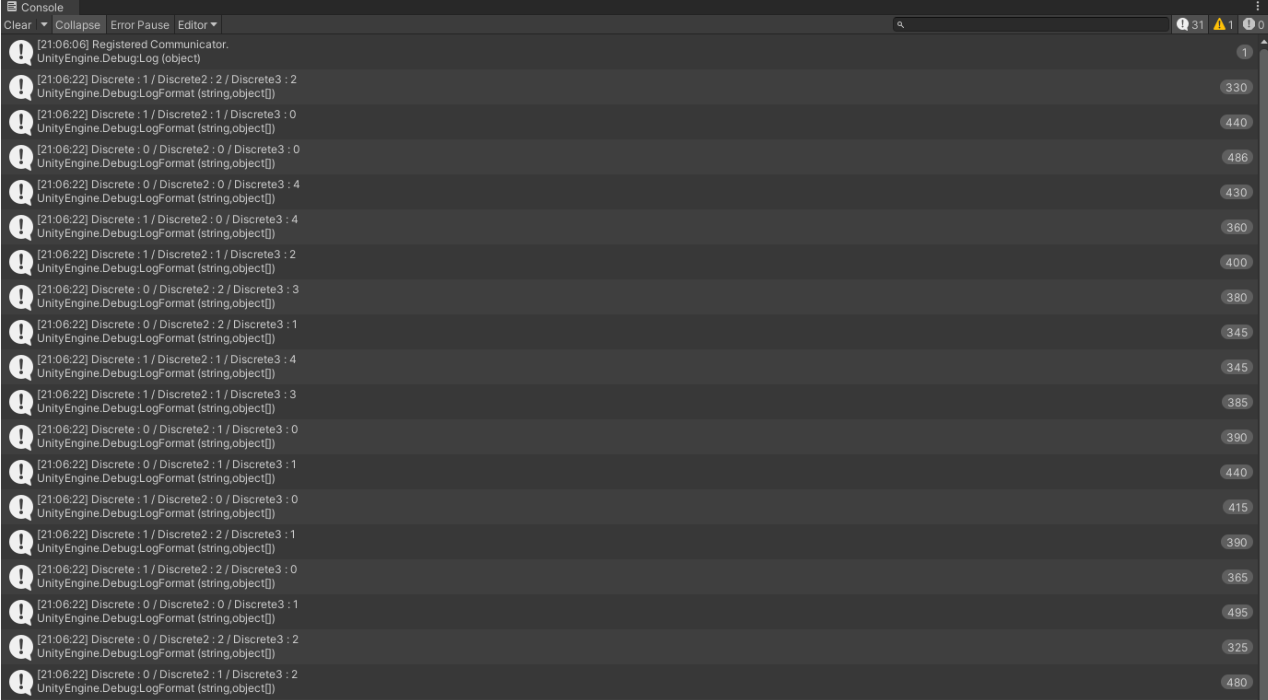
Debug.LogFormat("Discrete : {0} / Discrete2 : {1} / Discrete3 : {2}", Discrete, Discrete2, Discrete3);
}
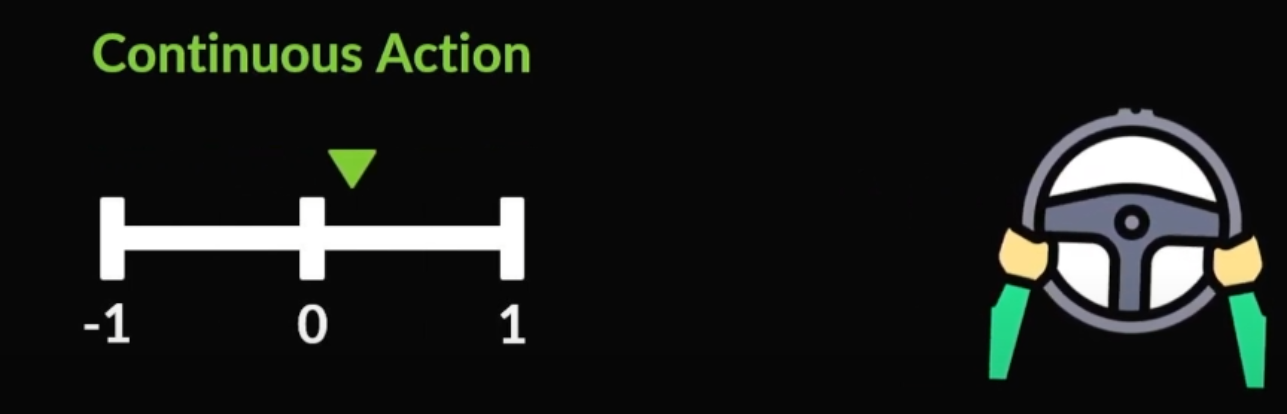
ContinuousActions : 연속 작업
특정 행동보다는 행동의 세기에 적절하게 사용할 수 있다.
public override void OnActionReceived(ActionBuffers actions)
{
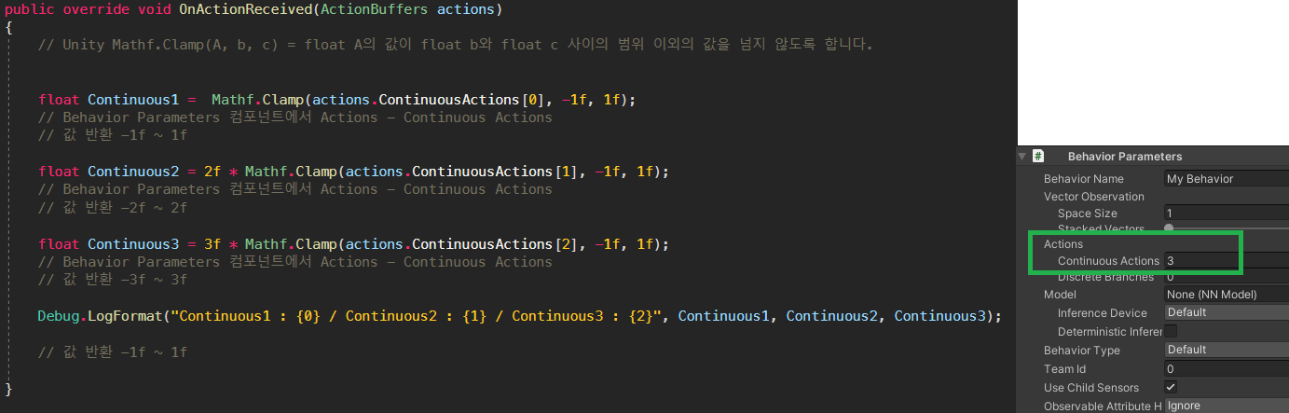
// Unity Mathf.Clamp(A, b, c) = float A의 값이 float b와 float c 사이의 범위 이외의 값을 넘지 않도록 합니다.
float Continuous1 = Mathf.Clamp(actions.ContinuousActions[0], -1f, 1f);
// Behavior Parameters 컴포넌트에서 Actions - Continuous Actions
// 값 반환 -1f ~ 1f
float Continuous2 = 2f * Mathf.Clamp(actions.ContinuousActions[1], -1f, 1f);
// Behavior Parameters 컴포넌트에서 Actions - Continuous Actions
// 값 반환 -2f ~ 2f
float Continuous3 = 3f * Mathf.Clamp(actions.ContinuousActions[2], -1f, 1f);
// Behavior Parameters 컴포넌트에서 Actions - Continuous Actions
// 값 반환 -3f ~ 3f
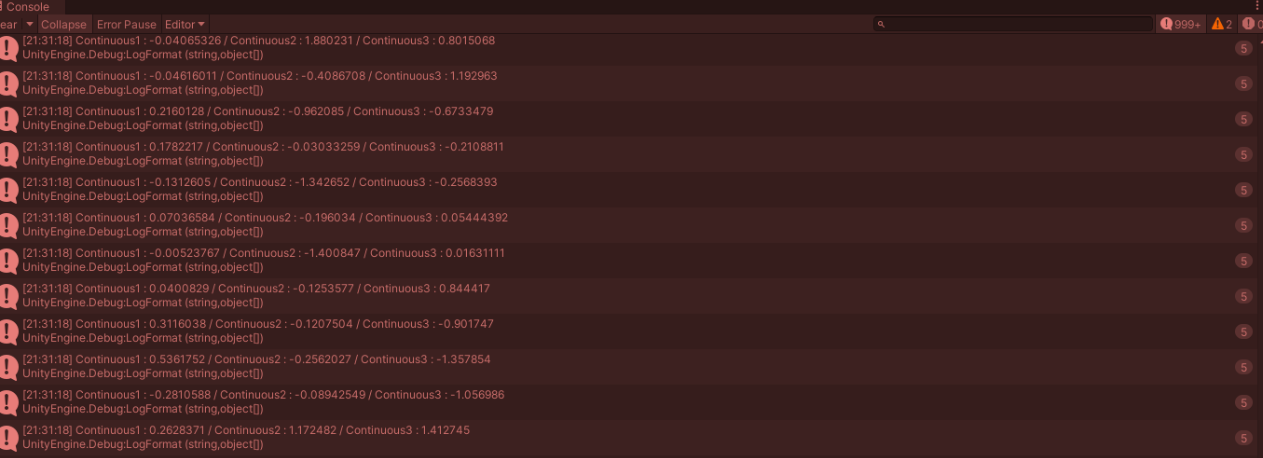
Debug.LogFormat("Continuous1 : {0} / Continuous2 : {1} / Continuous3 : {2}", Continuous1, Continuous2, Continuous3);
// 값 반환 -1f ~ 1f
}
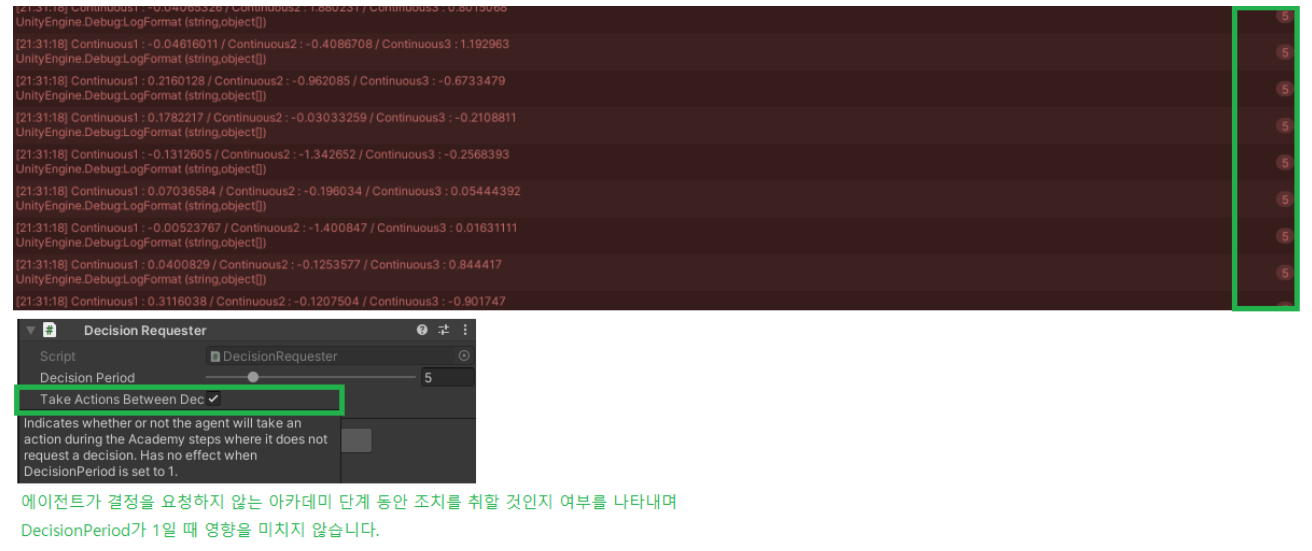
Decision Requester : 결정 주기

우리가 호출한 OnActionReceived 함수가 5번 호출될 때 마다 한번의 액션을 반환하는 설정
그러나 Take Actions Betwwn Decisions 가 체크되어 있으면 동일한 결정을 5번씩 호출

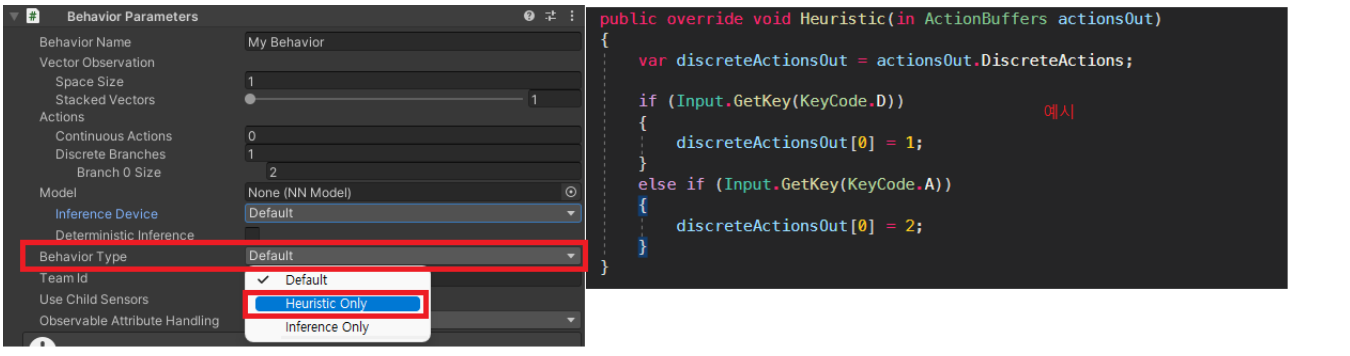
Heuristic : 스스로 발견하게 하는
사용자가 직접 입력을 통해서 에이전트를 조정하여 액션 및 환경 메커니즘 등..을 확인 할 수 있습니다.
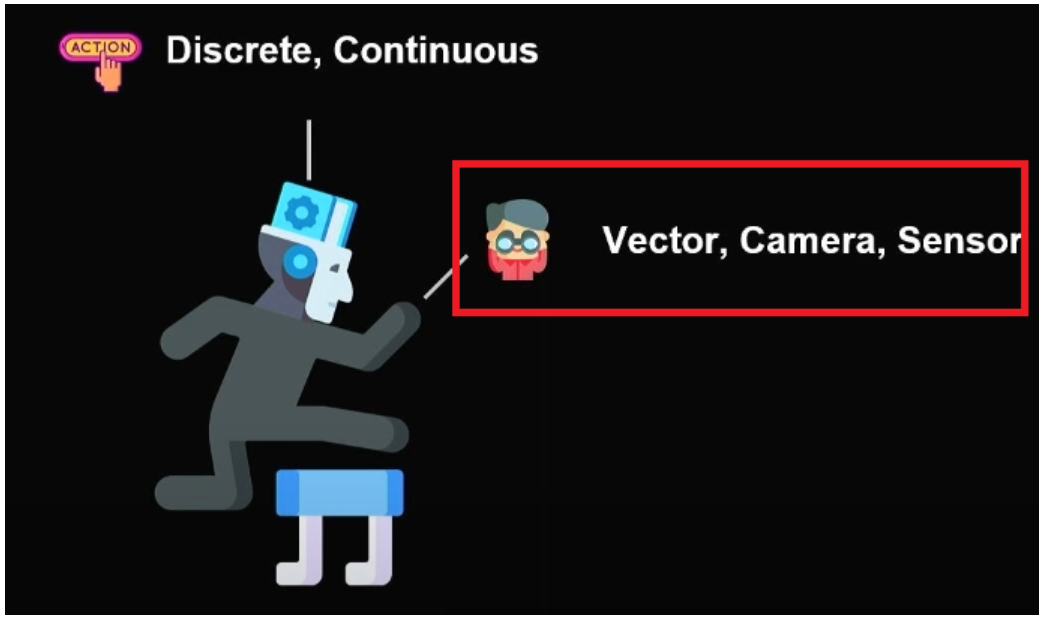
관찰
Vector / Camera / Sensor 를 이용하여 학습
위치 알려주거나 센서로 탐지 / 카메라를 이용한 이미지 감지는 학습시간이 오래걸린다
CollectObservations : 수집 관찰
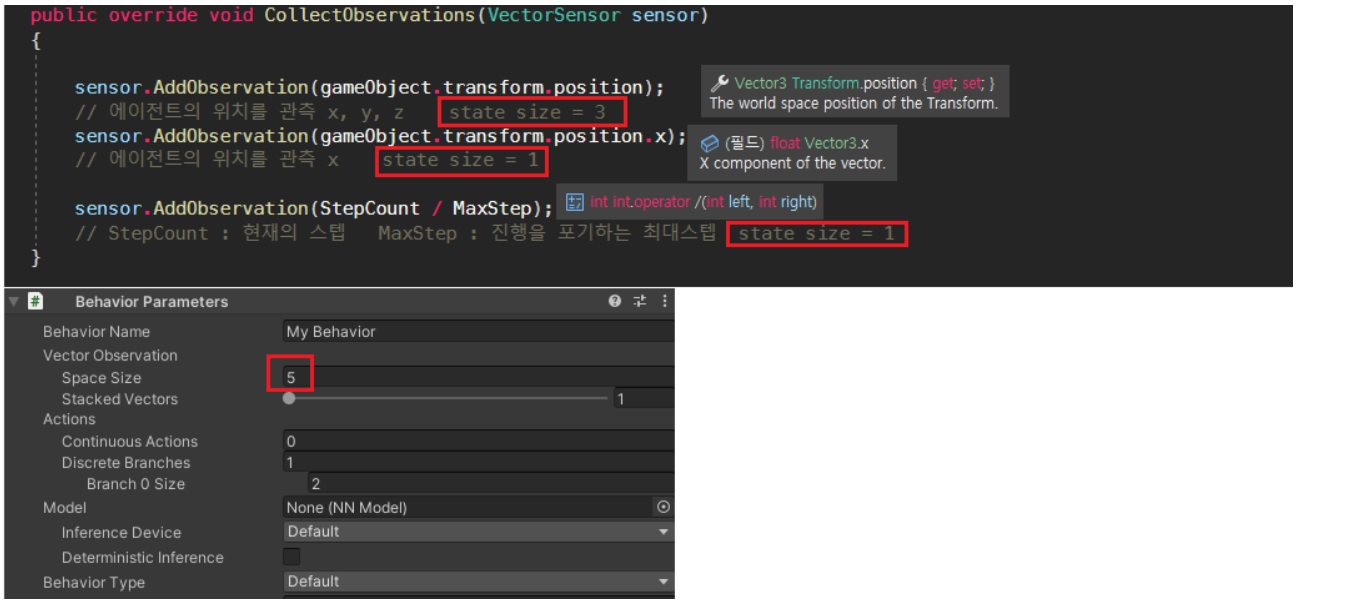
관측 개수와 Vector Observation – Space Size 의 크기를 맞추어 준다.
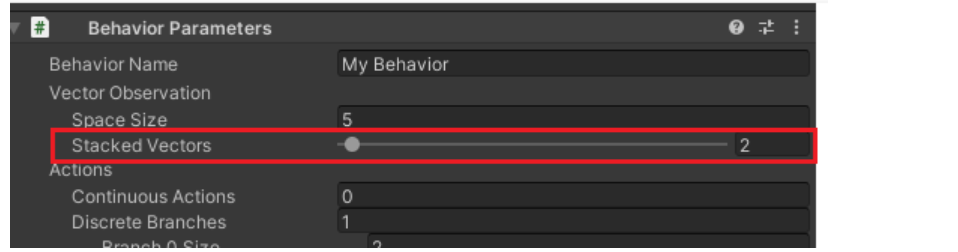
Vector Observation – Stacked Vectors
이전 그리고 그 이전의 Space Size 를 기록하는 공간입니다.
이 경우 전체의 Space Size 는 5 * 2 = 10
지금 당장의 관측값만을 사용하는 것이 아닌 이전의 관측값까지 이용하기 위함입니다
학습이 가능한 공간 범위내로 가장 작게 설정하는 것을 추천합니다.
Ray perceptions Sensor 3D
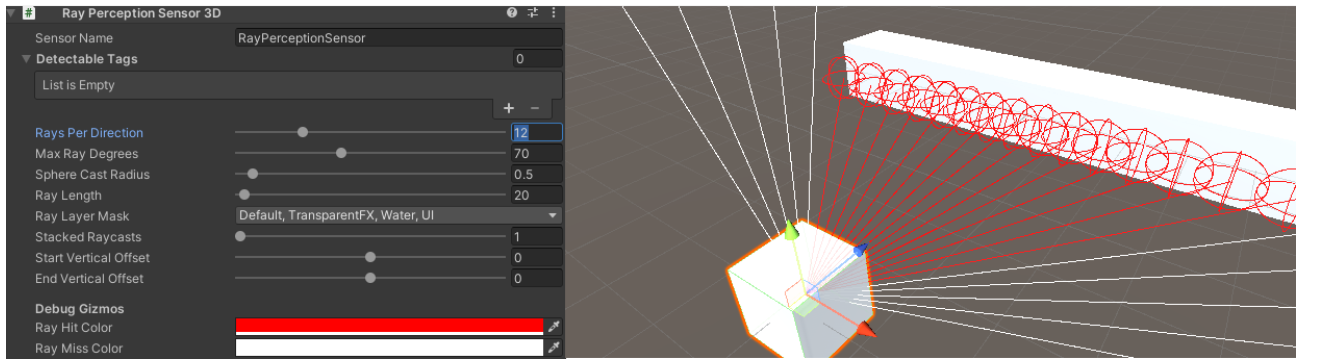
Rays Per Direction 방향당 광선
Ray 의 방향당 광선의 수를 조절합니다.
Ray 의 수가 많을 수록 관측하는 값이 많아집니다.
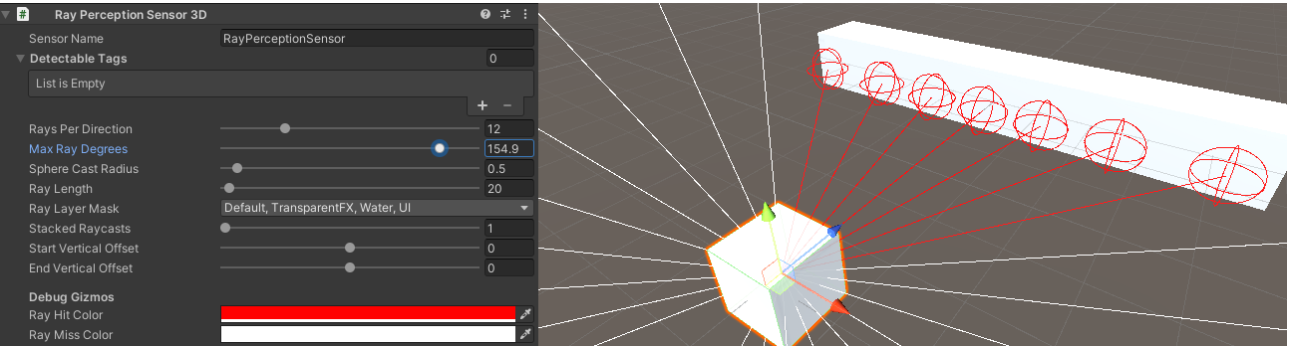
Max Ray Degrees 최대 광선 각도
광선의 원뿔 크기로 90도를 사용하면 광선이 왼쪽으로 투사됩니다.
90보다 크면 뒤로 이동합니다.
값이 60도이면 광선이 중심선의 왼쪽과 오른쪽으로 30도 이상 확산됩니다.
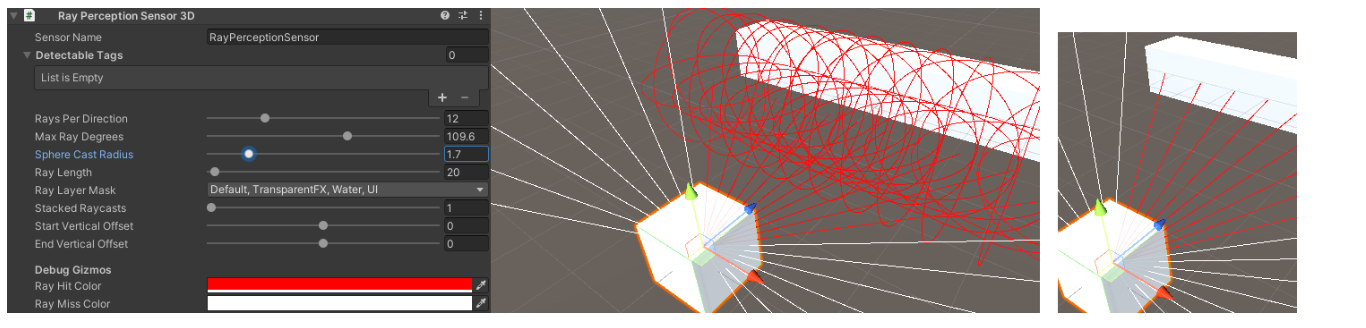
Sphere Cast Radius 구면 주조 반지름
캐스팅할 구의 반경입니다. RayCast 의 경우 0으로 설정합니다.
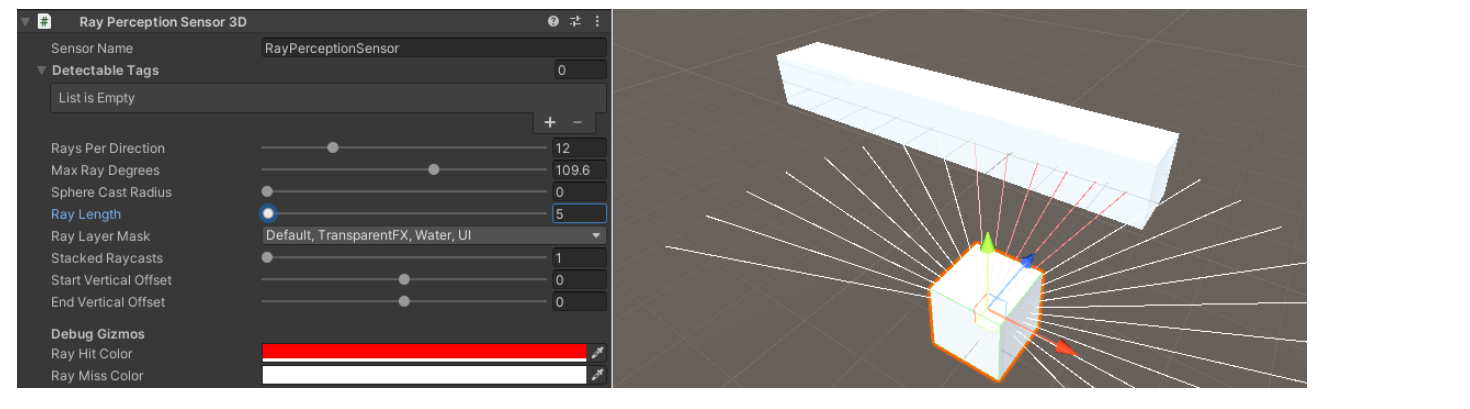
Ray Length 광선 길이
투사할 광선의 길이를 설정합니다.
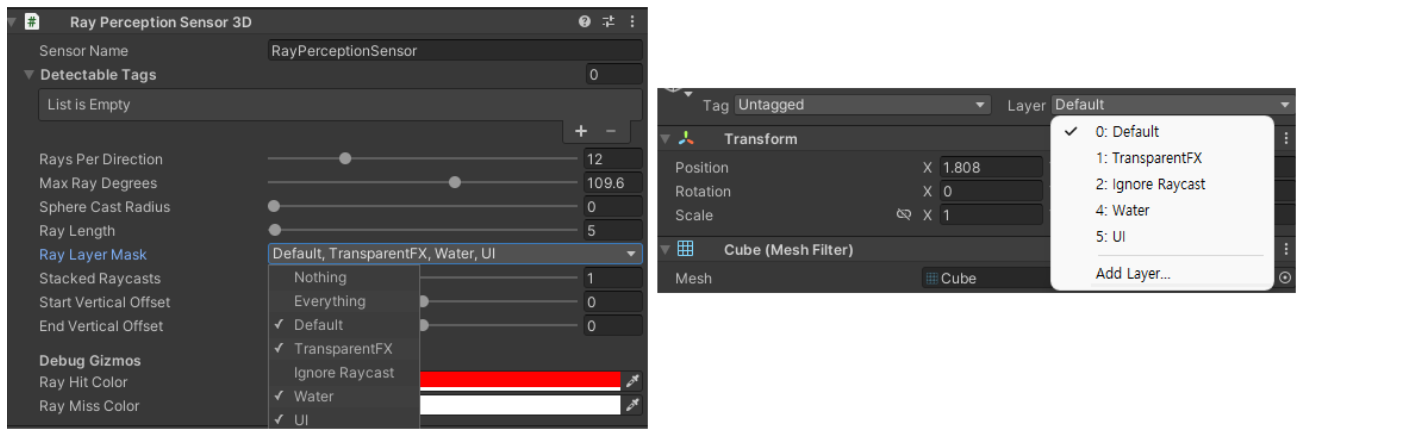
Ray Layer Mask 레이 레이어 마스크
광선이 닿을 수 있는 레이어를 제어합니다. ( 물체의 레이어가 체크되지 않으면 통과합니다. )
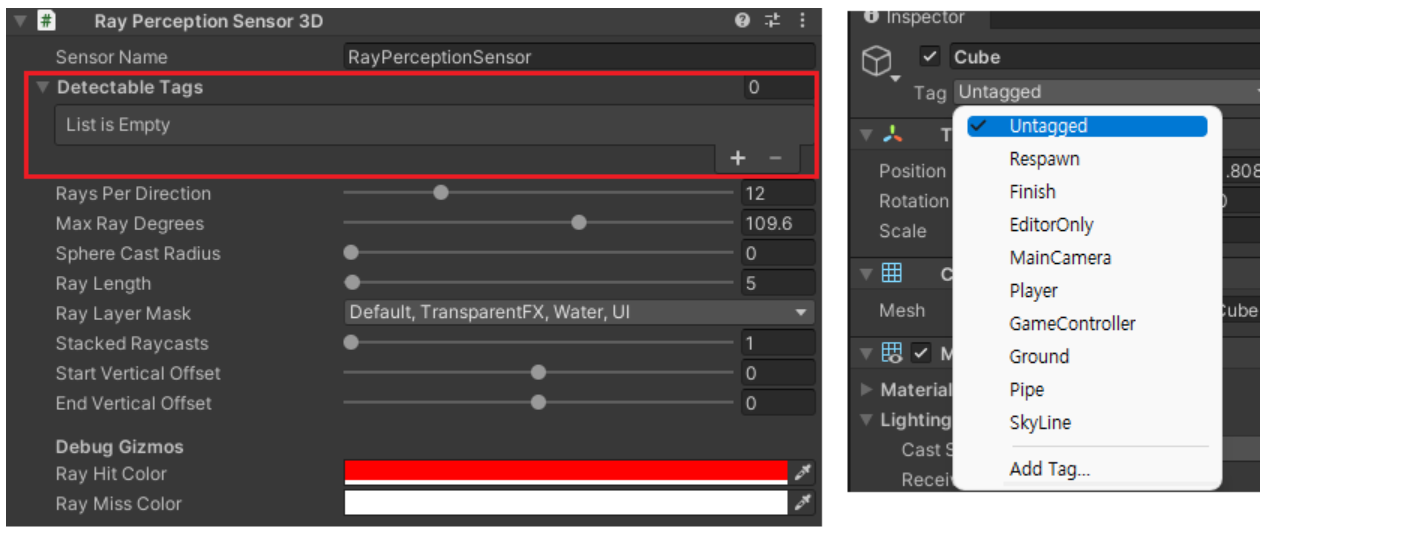
Detectable tags 감지 가능한 태그
감지 가능한 태그 목록을 추가해 줍니다
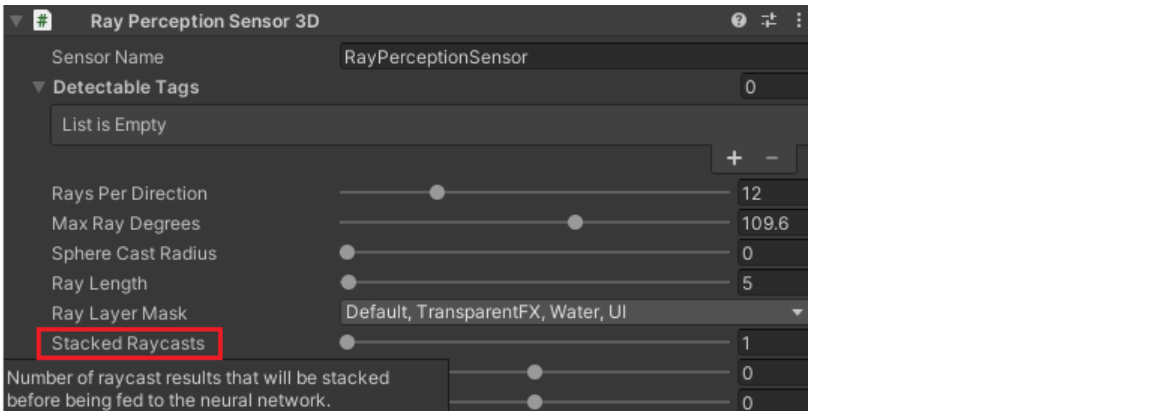
Stacked Raycasts 누적된 레이캐스트
신경망에 피드하기 전에 스택되는 레이캐스트 결과 수 입니다.
함께 쌓을 이전 관찰의 수를 지정합니다.
기본값 1은 현재 관측값만 보는 것을 의미합니다.
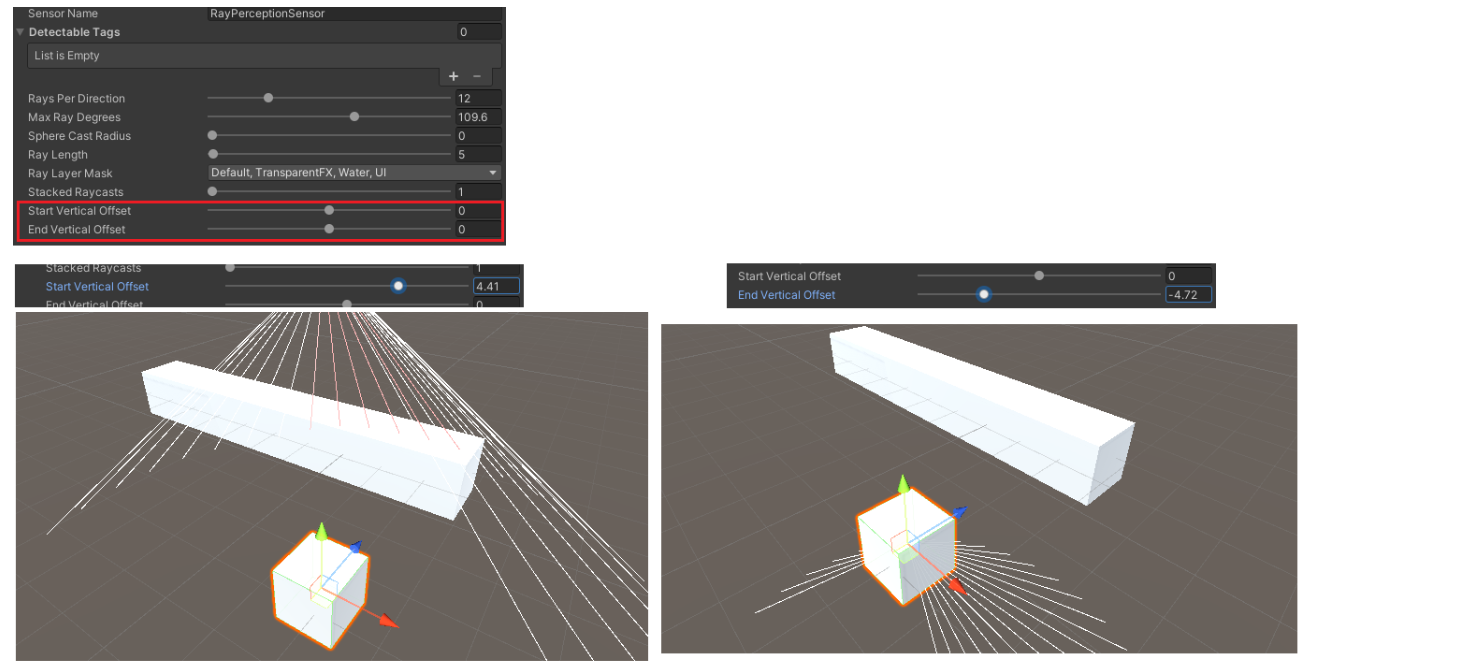
Start Vertical Offset 수직 오프셋 시작
광선이 Y축을 따라 일부 오프셋에서 시작됨을 의미합니다(즉, 에이전트 중심 위 또는 아래).
End Vertical Offset 수직 오프셋 끝
광선이 Y축을 따라(즉, 수평선 위 또는 아래에서) 약간의 오프셋에서 종료된다는 것을 의미합니다.